Restore LTFS tape
Restore an entire tape, or selectively restore some folders or files
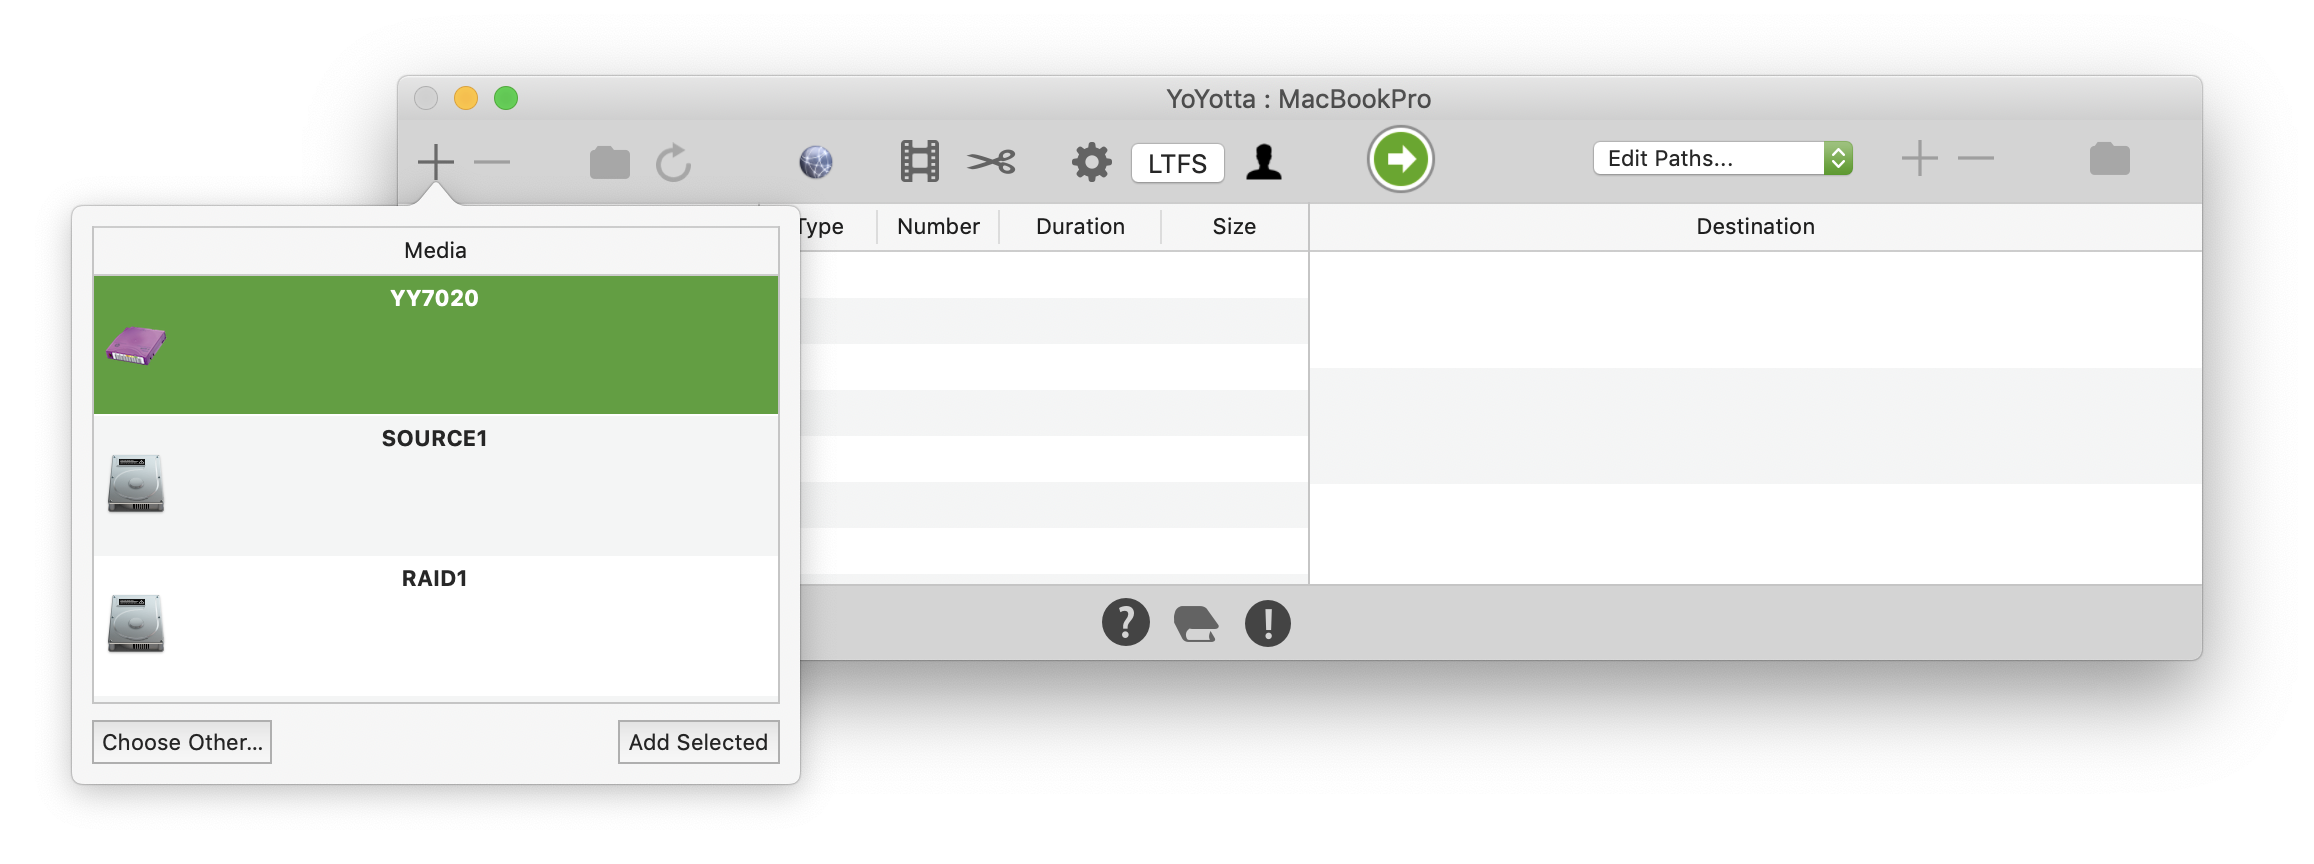
Load the tape
Put the tape into a standalone drive or tape library.
Select the tape from the available media. Click Add Selected.
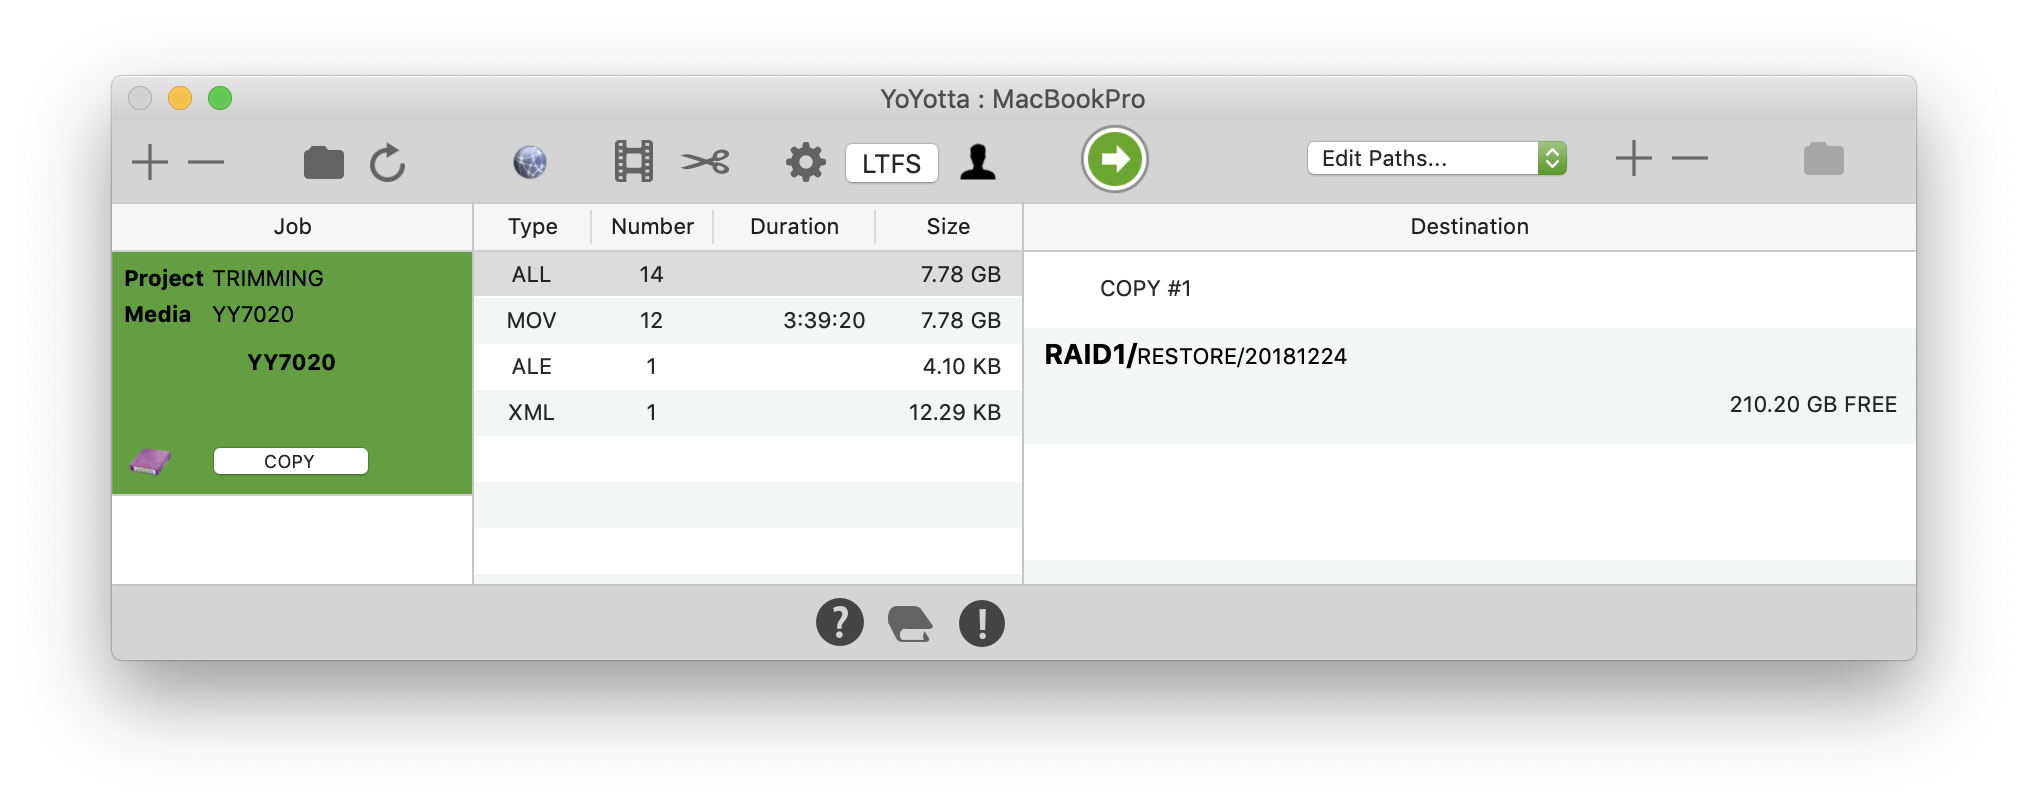
A job will appear in the job table.
New jobs will use the current project open in the Project Browser.
Each job can be assigned to a different project, the project name is shown in the job table.
Open the Source Browser to change the project for an existing job.
See Assigning a job to a different project.
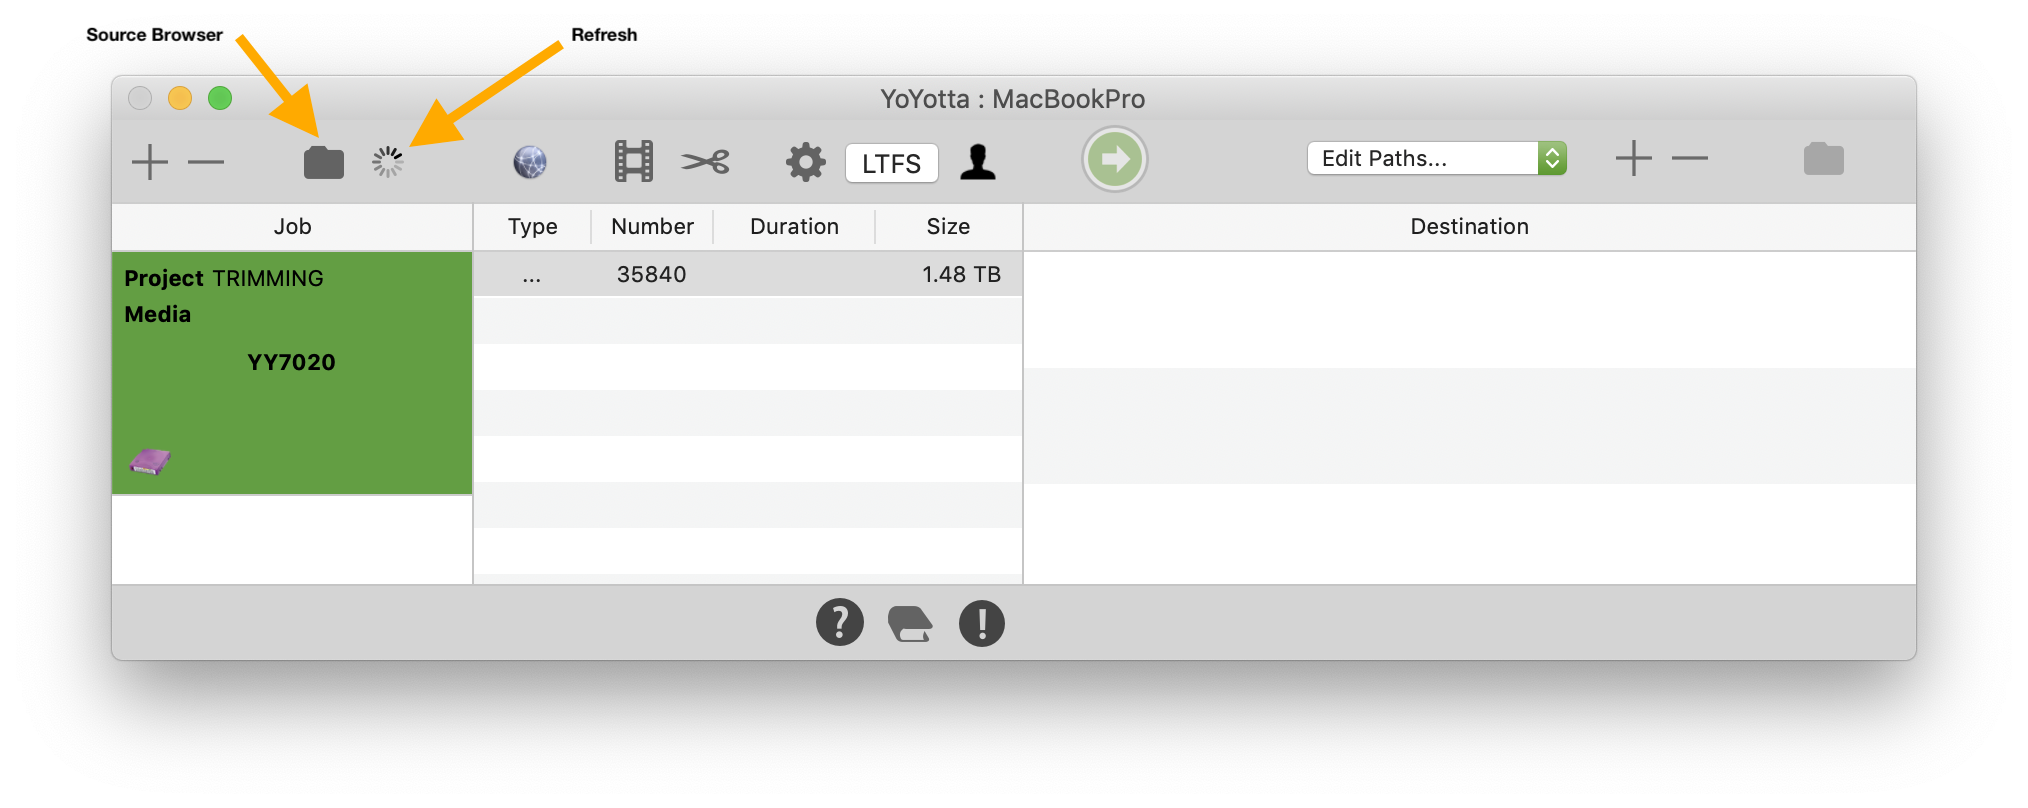
Indexing and browsing the tape
To browse the tape contents click the folder above the job table and the Source Browser will open.
Alternatively to just see the file types and sizes click the refresh button.
YoYotta will automatically mount and index the tape.
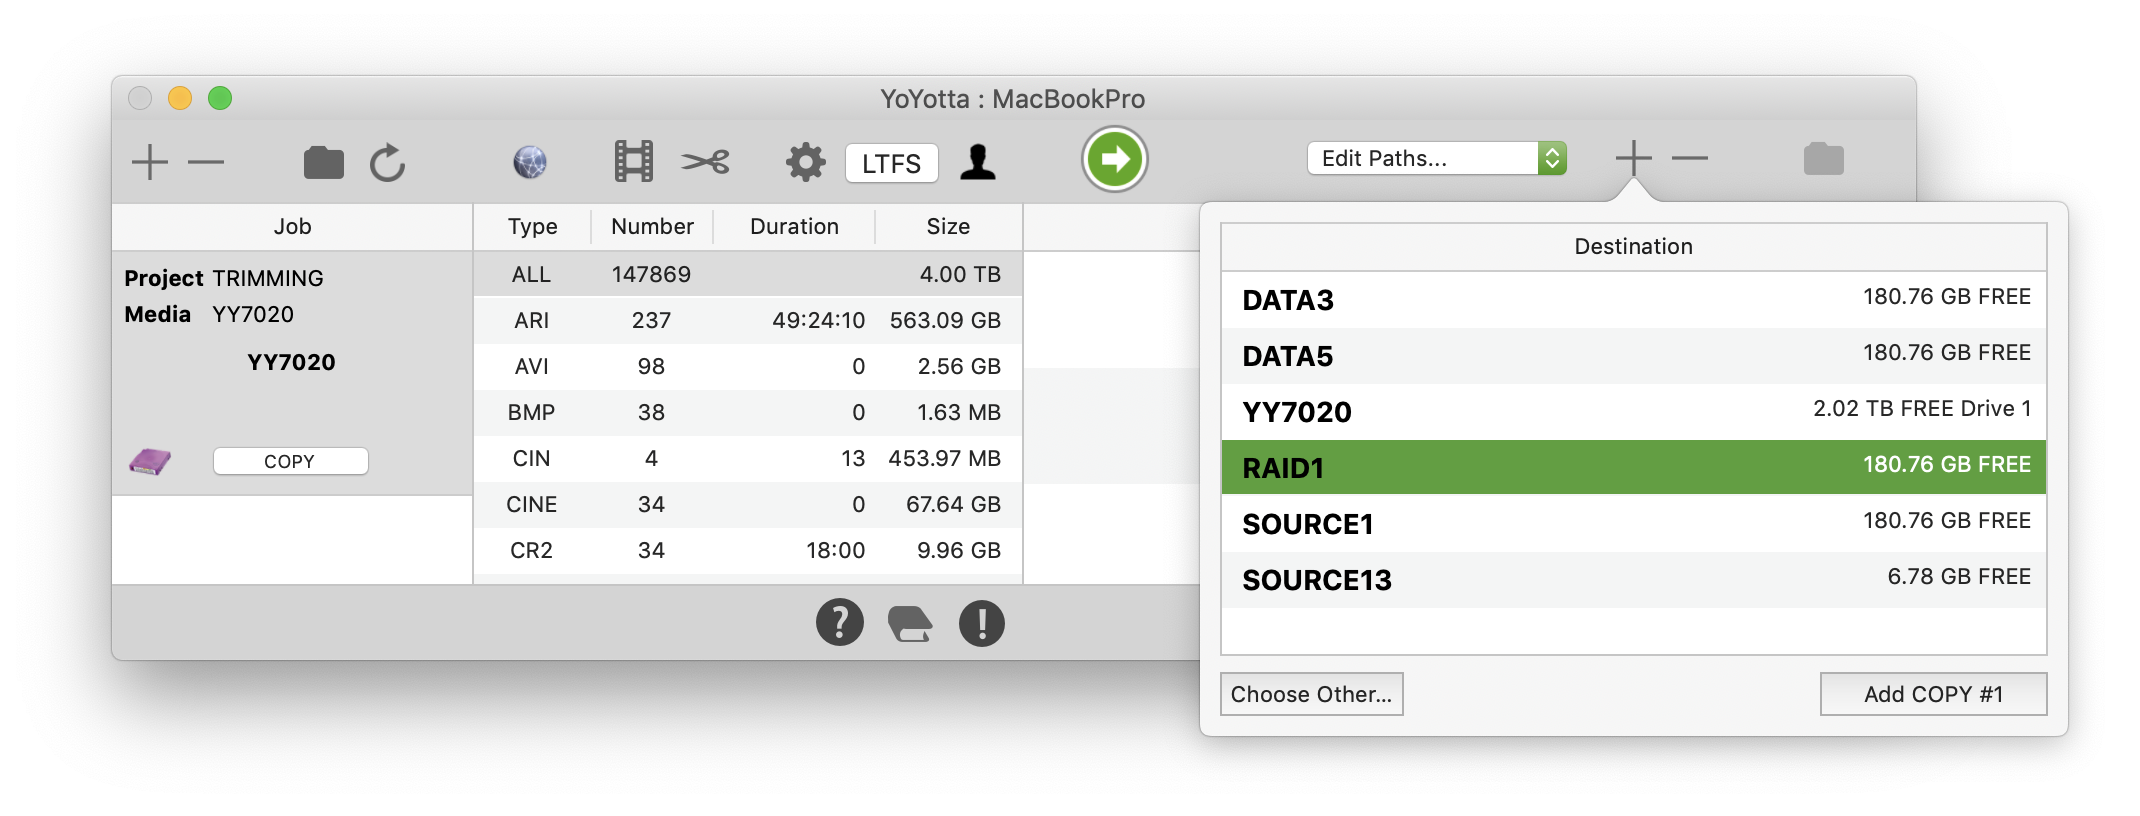
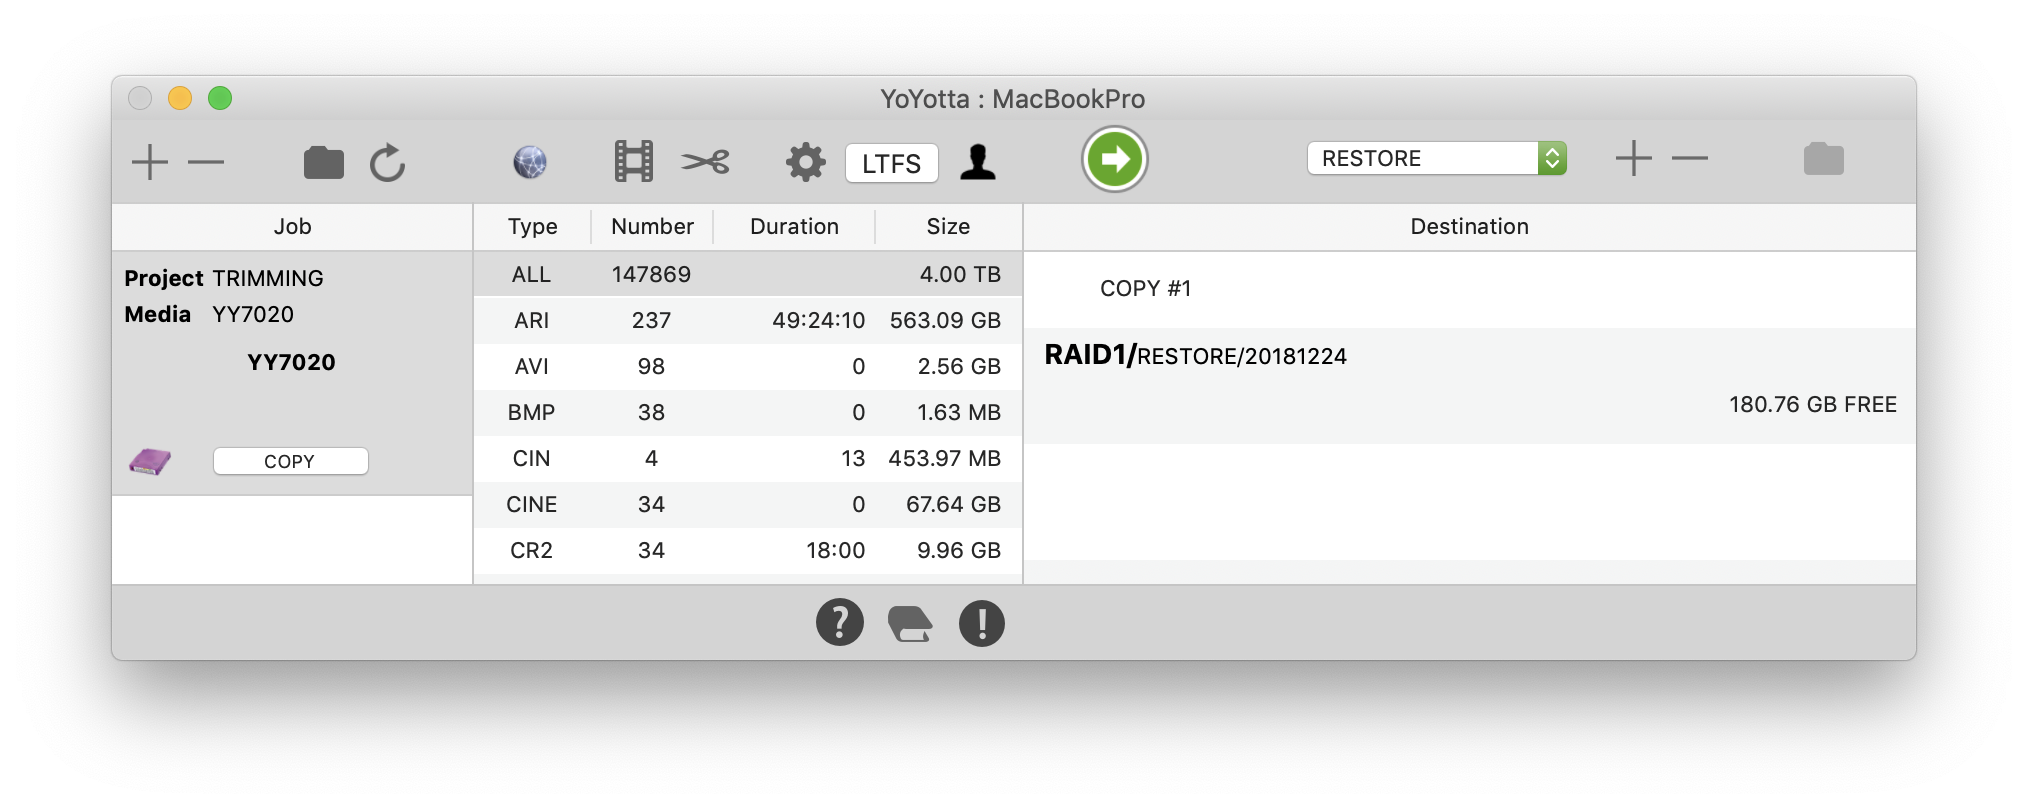
Add a destination
Select the location for the restore, drop in a restore folder, or drop in the parent of the original folder.
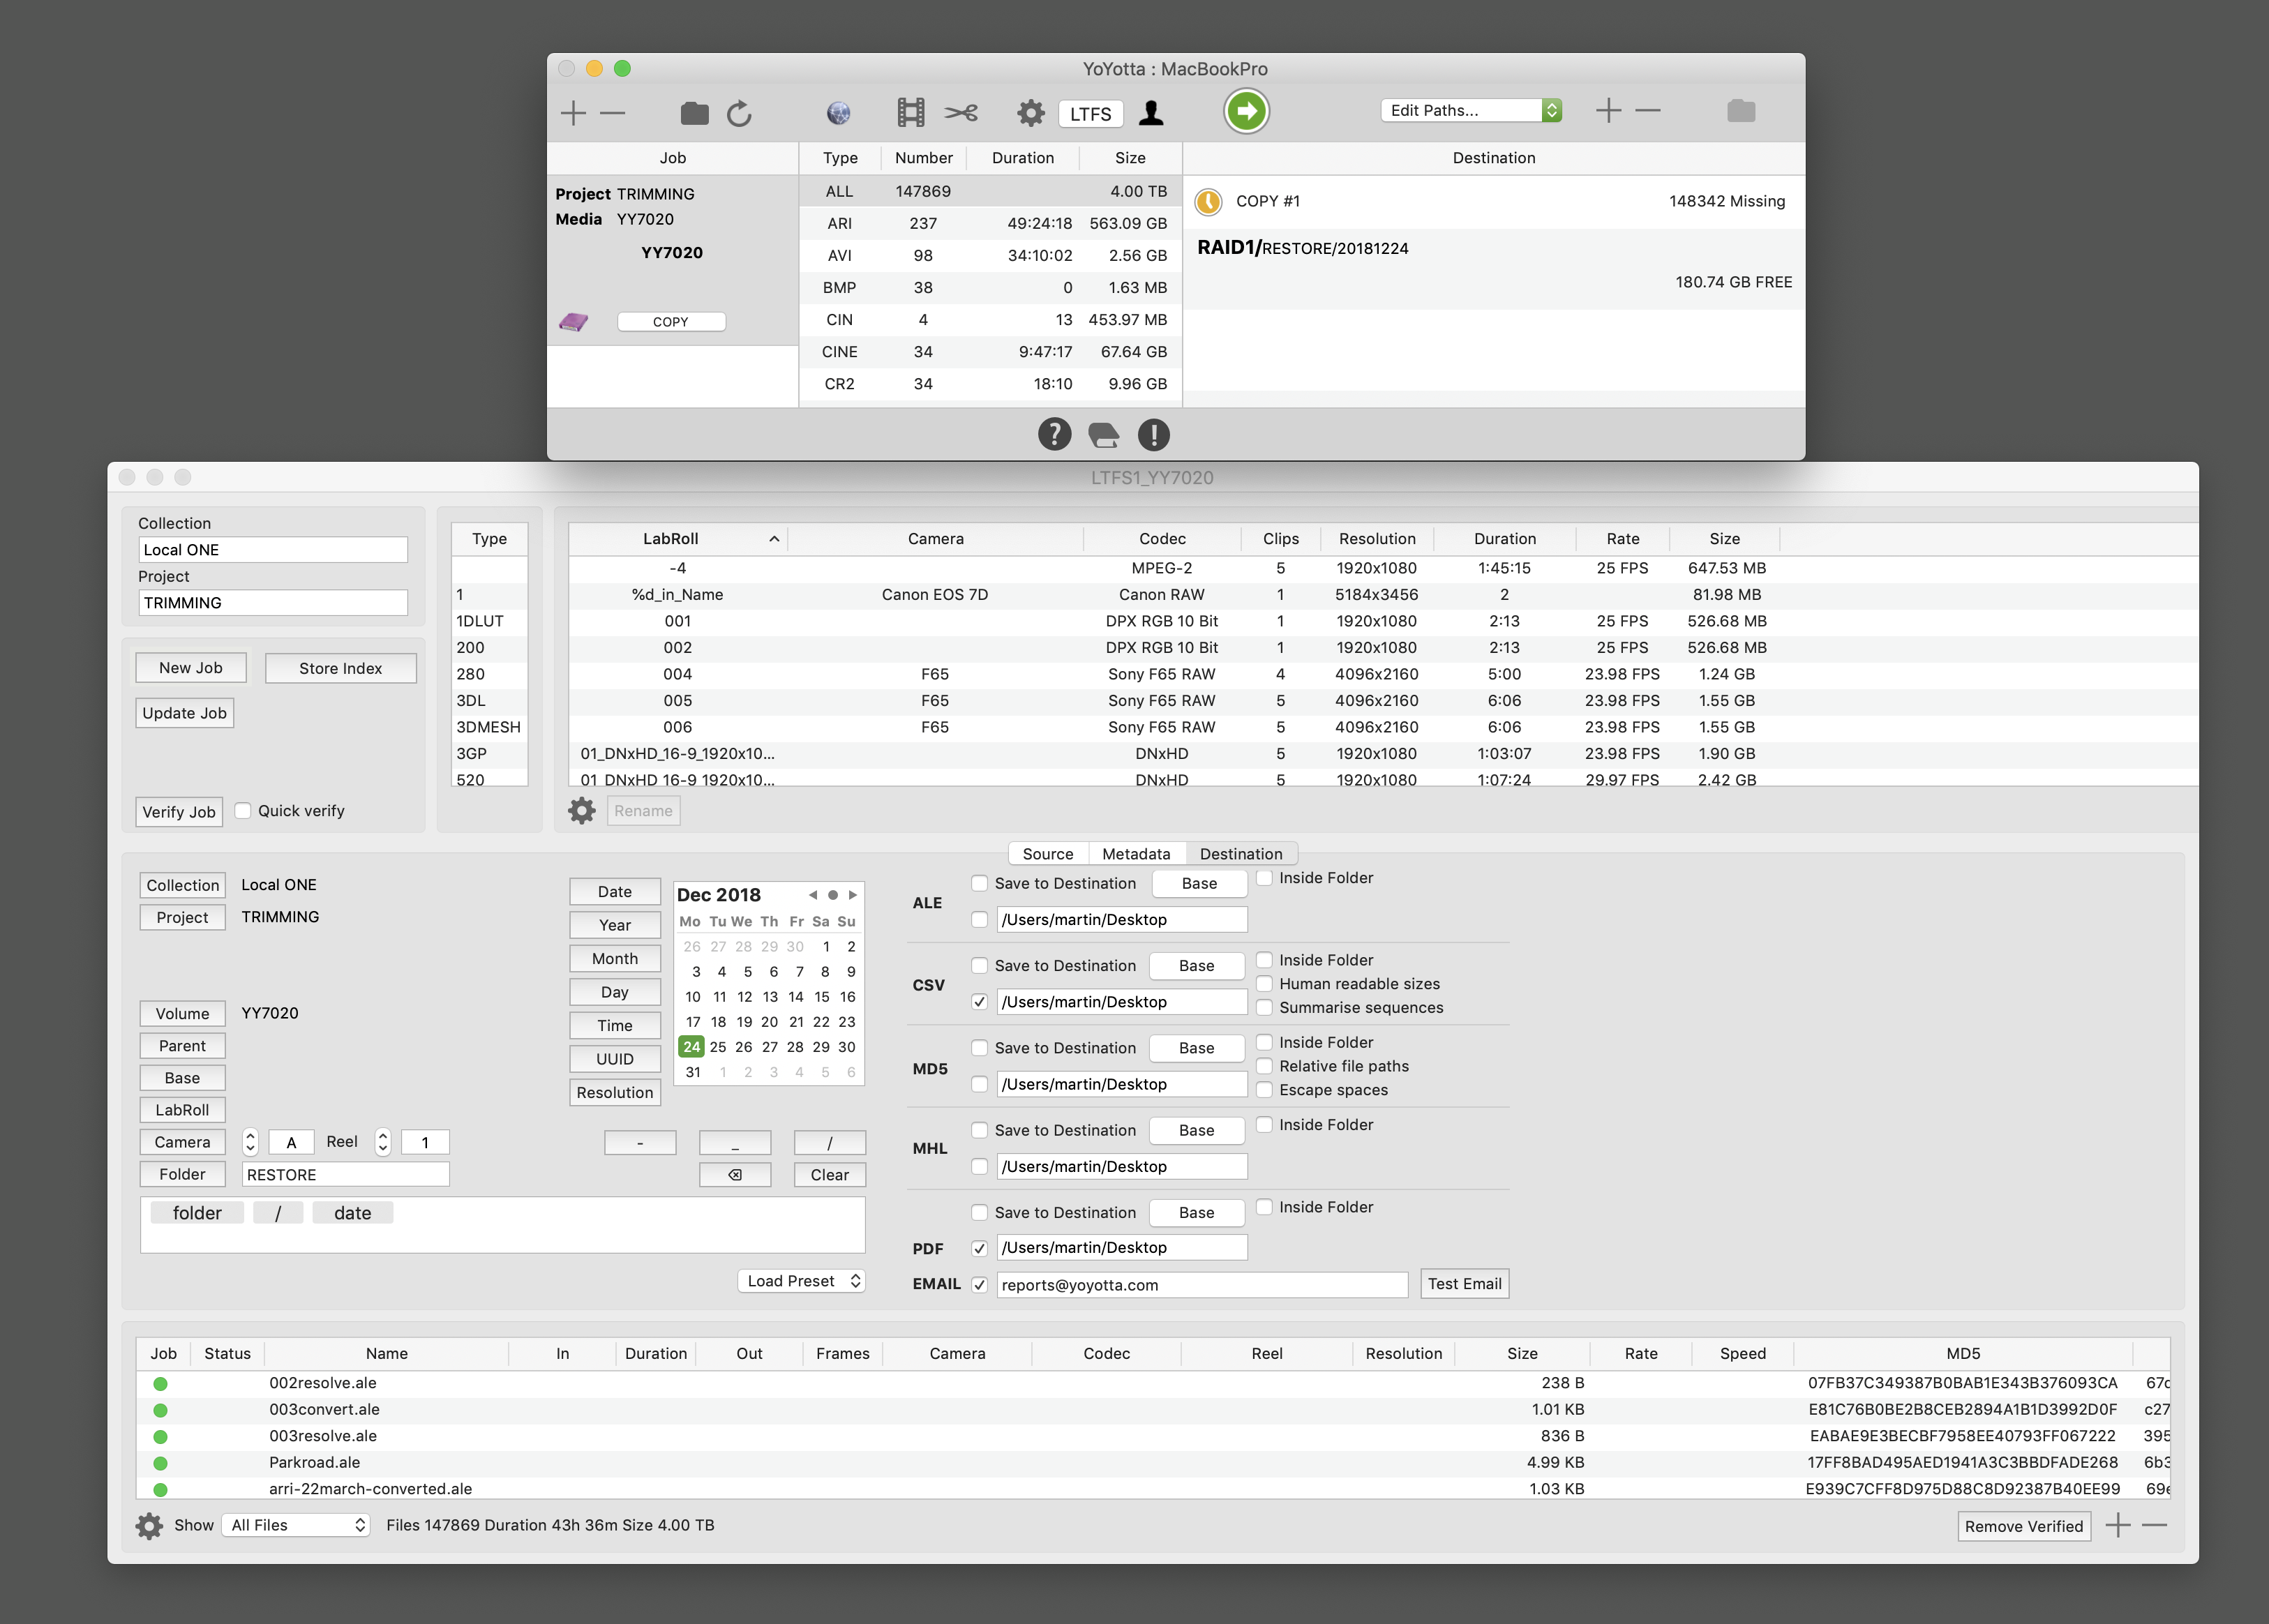
Set the restore path
Click the Edit paths dropdown and release, this will open the Source Browser showing the destination setup.
In this example the path tokens folder will be replaced with RESTORE and date will be replaced by todays date.
Add volume to include the tape name. Also choose the reports required.
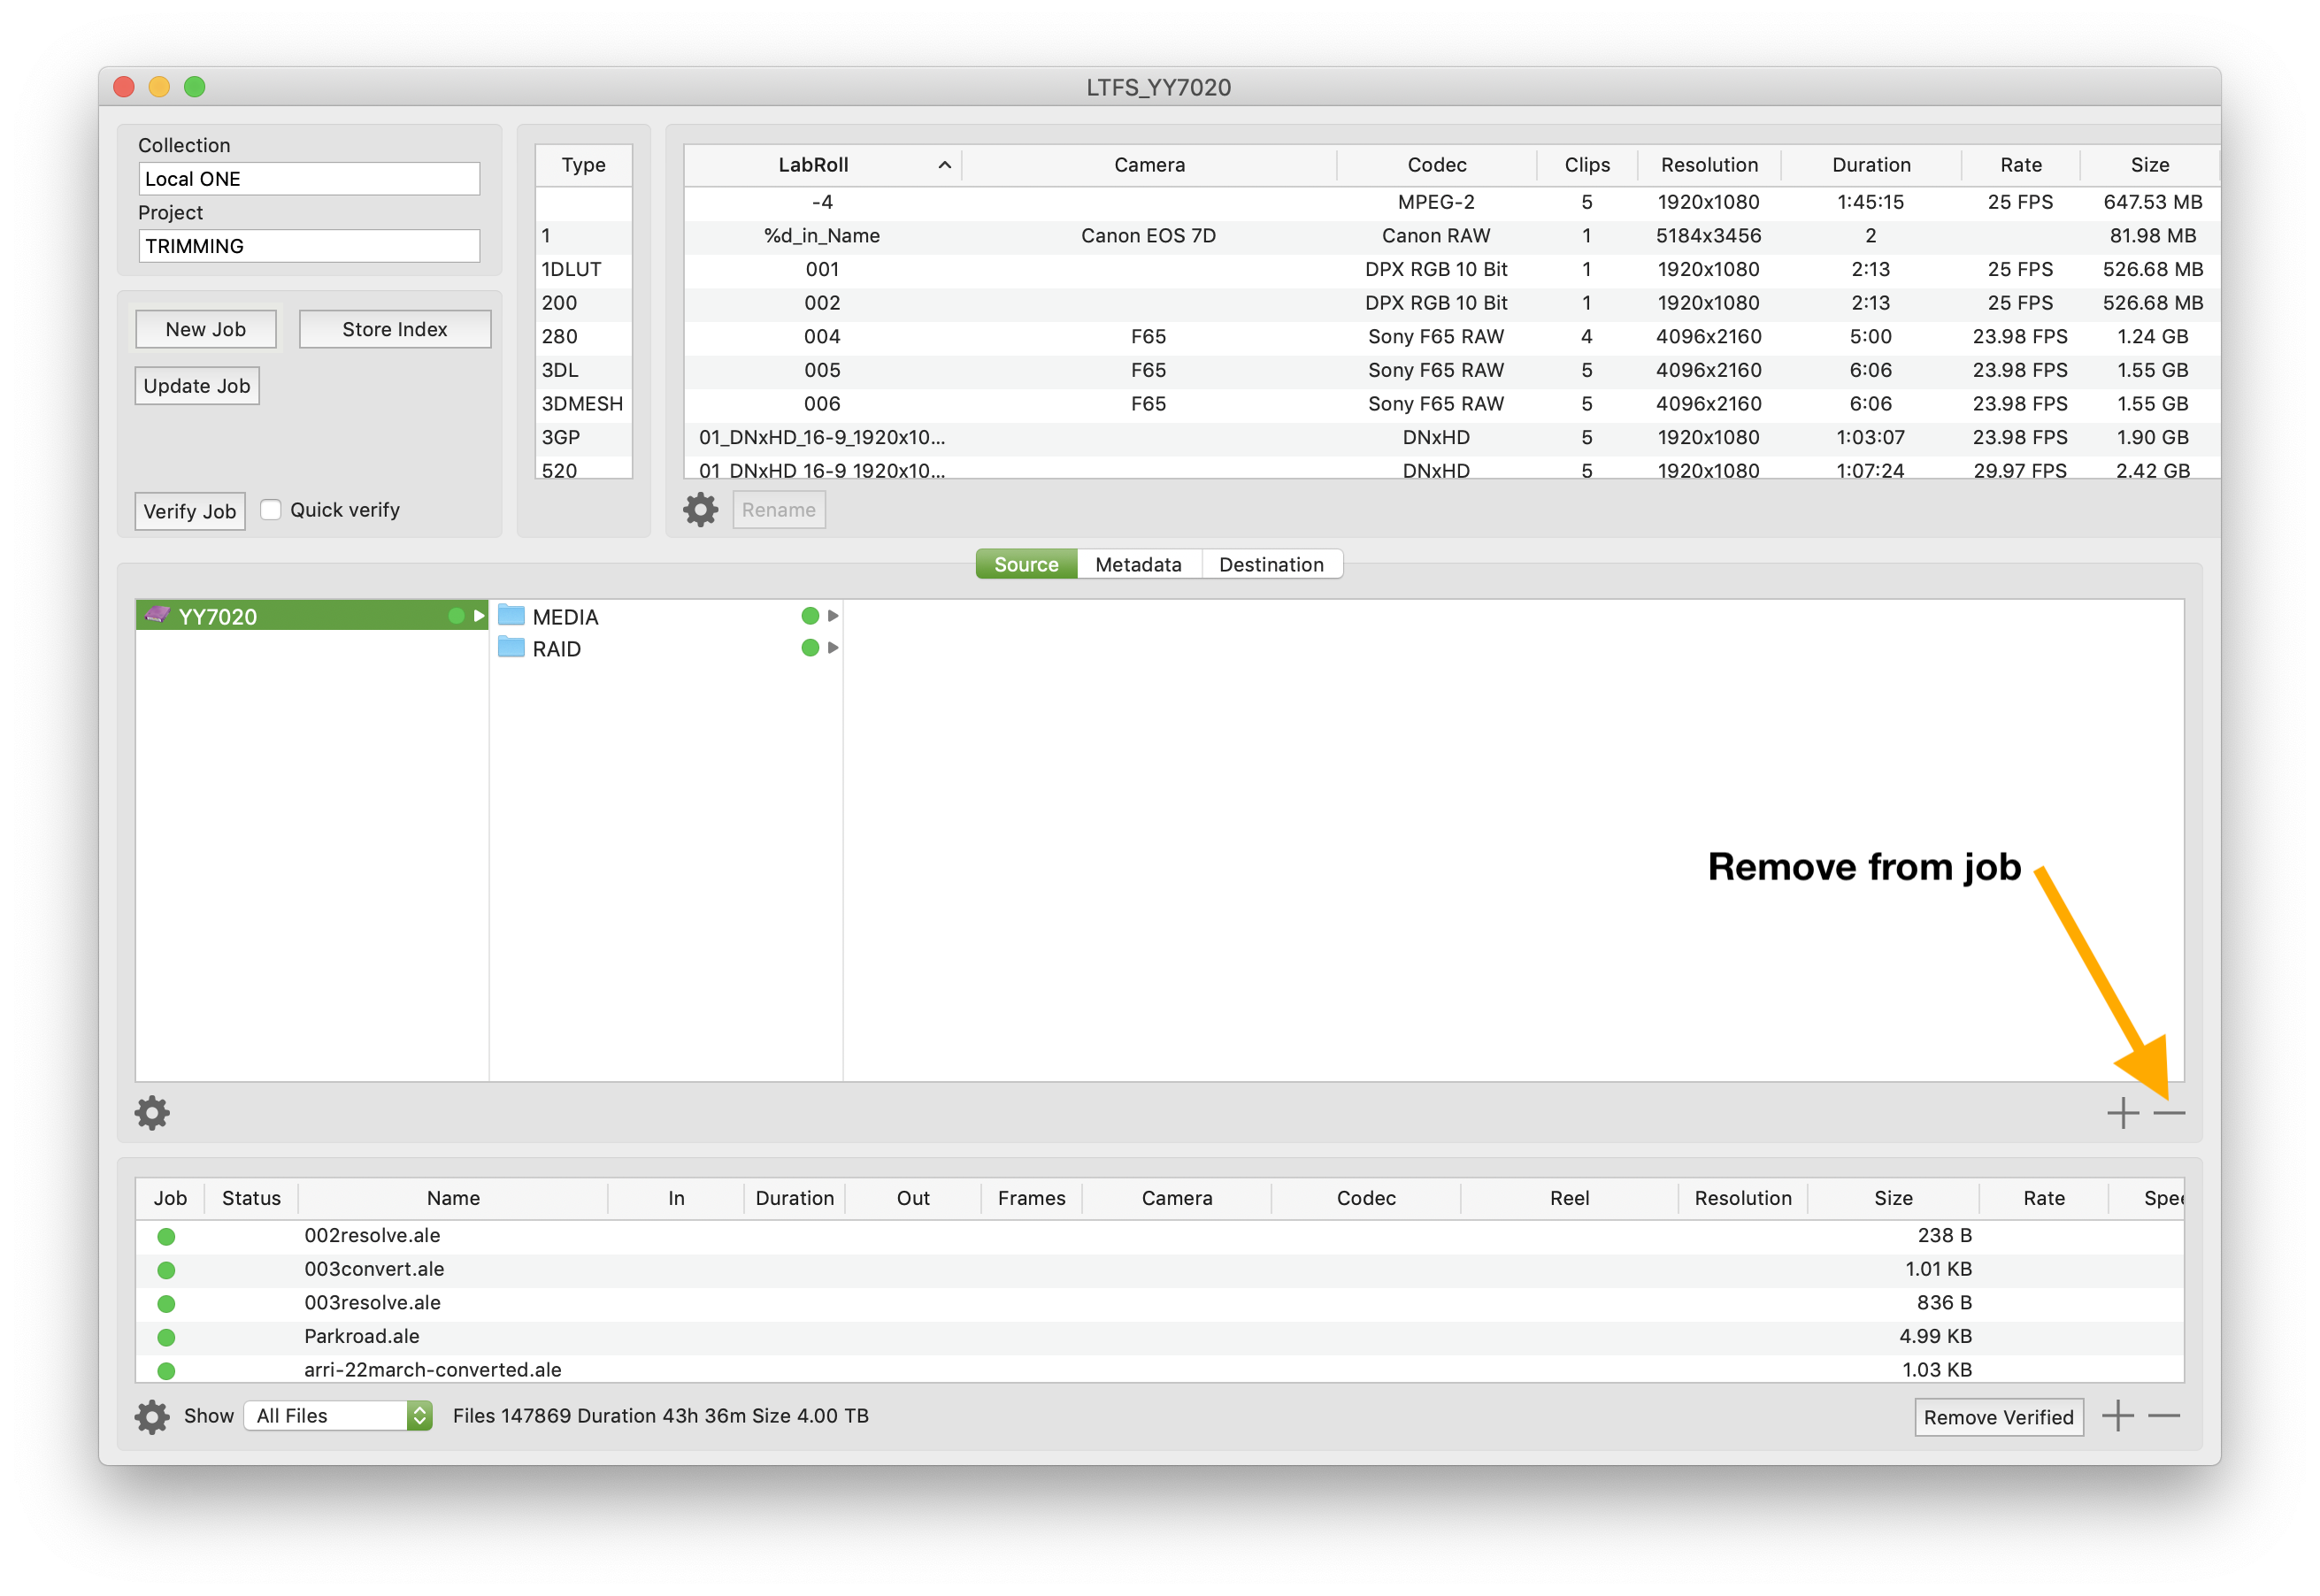
Source Browser and selective restores
By default all files are included in the restore job. The Source Browser shows the tape contents and the green dot indicates that the items are included in the job.
Select any unwanted files or folders, then click the - button and then click Update Job.
Alternatively click New Job and a new selective job will appear in the job table.
If you only need a few files restored then select the tape folder on the left and click the - button. All the green dots will disappear. Now add back the required items as described below.
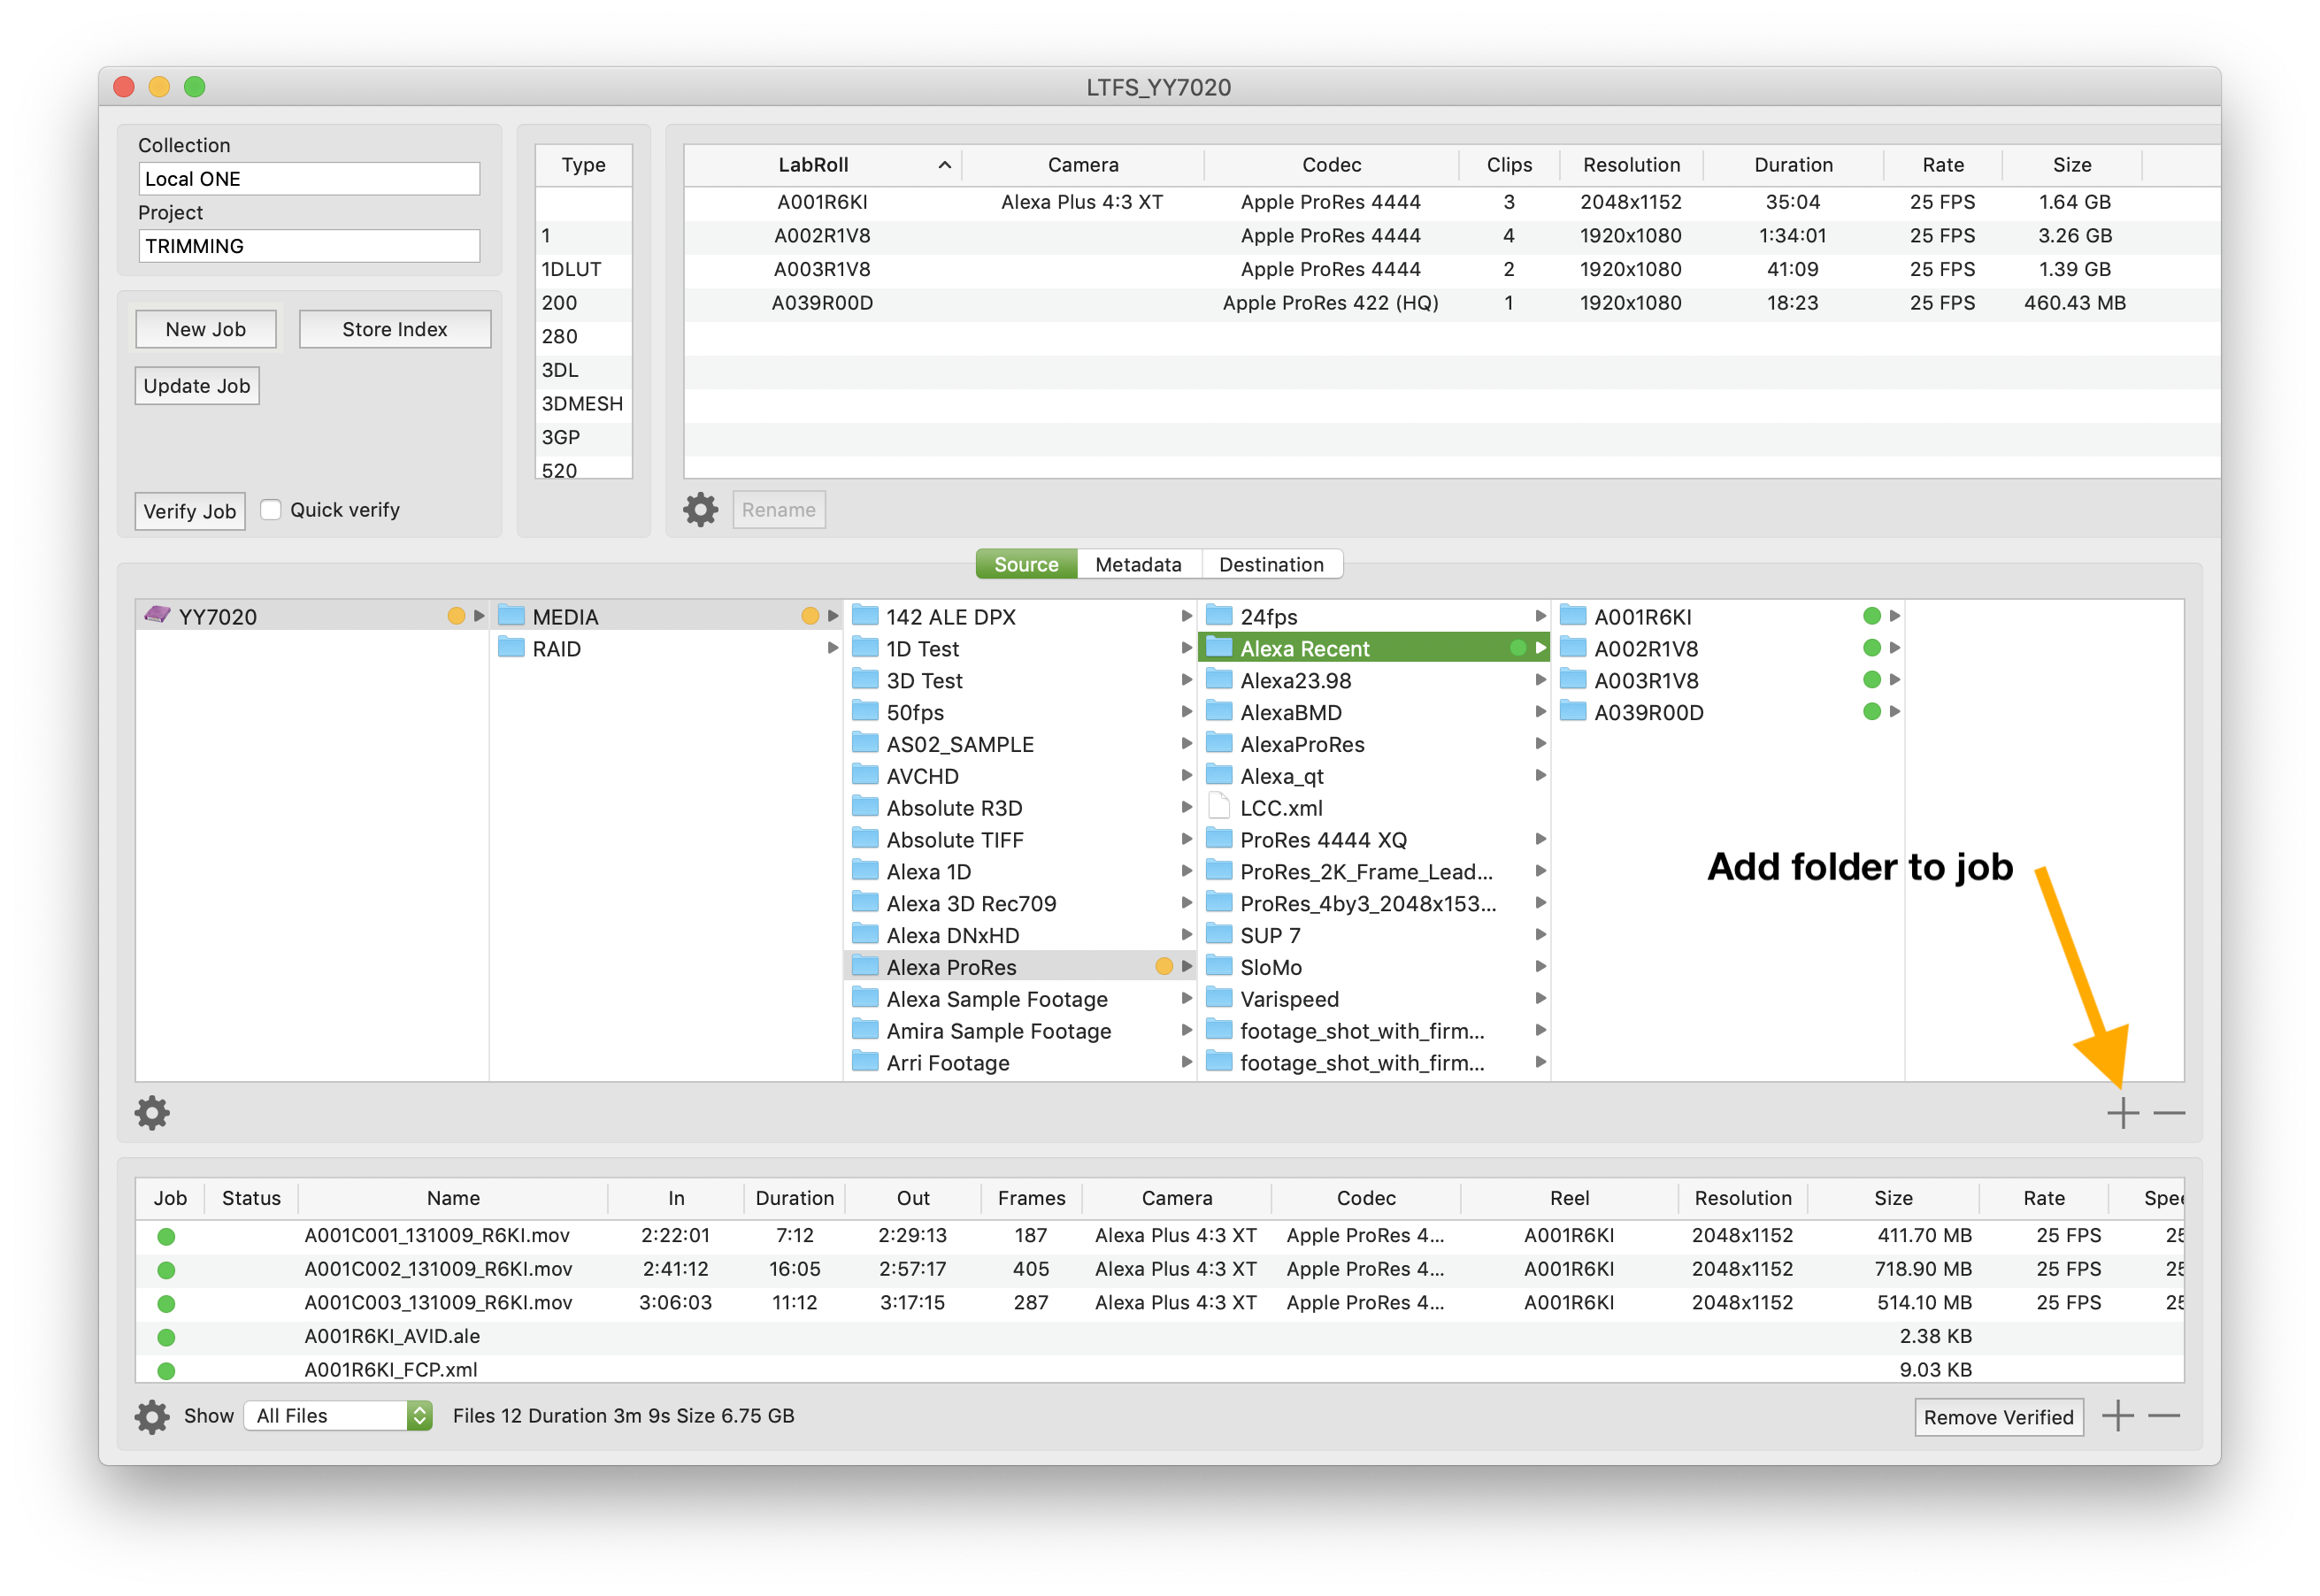
Add items to the restore job
Select some folders and click the + button to add them to the job. Green dots will appear on the selected items.
An orange dot indicates that some of the items in the folder are in the job.
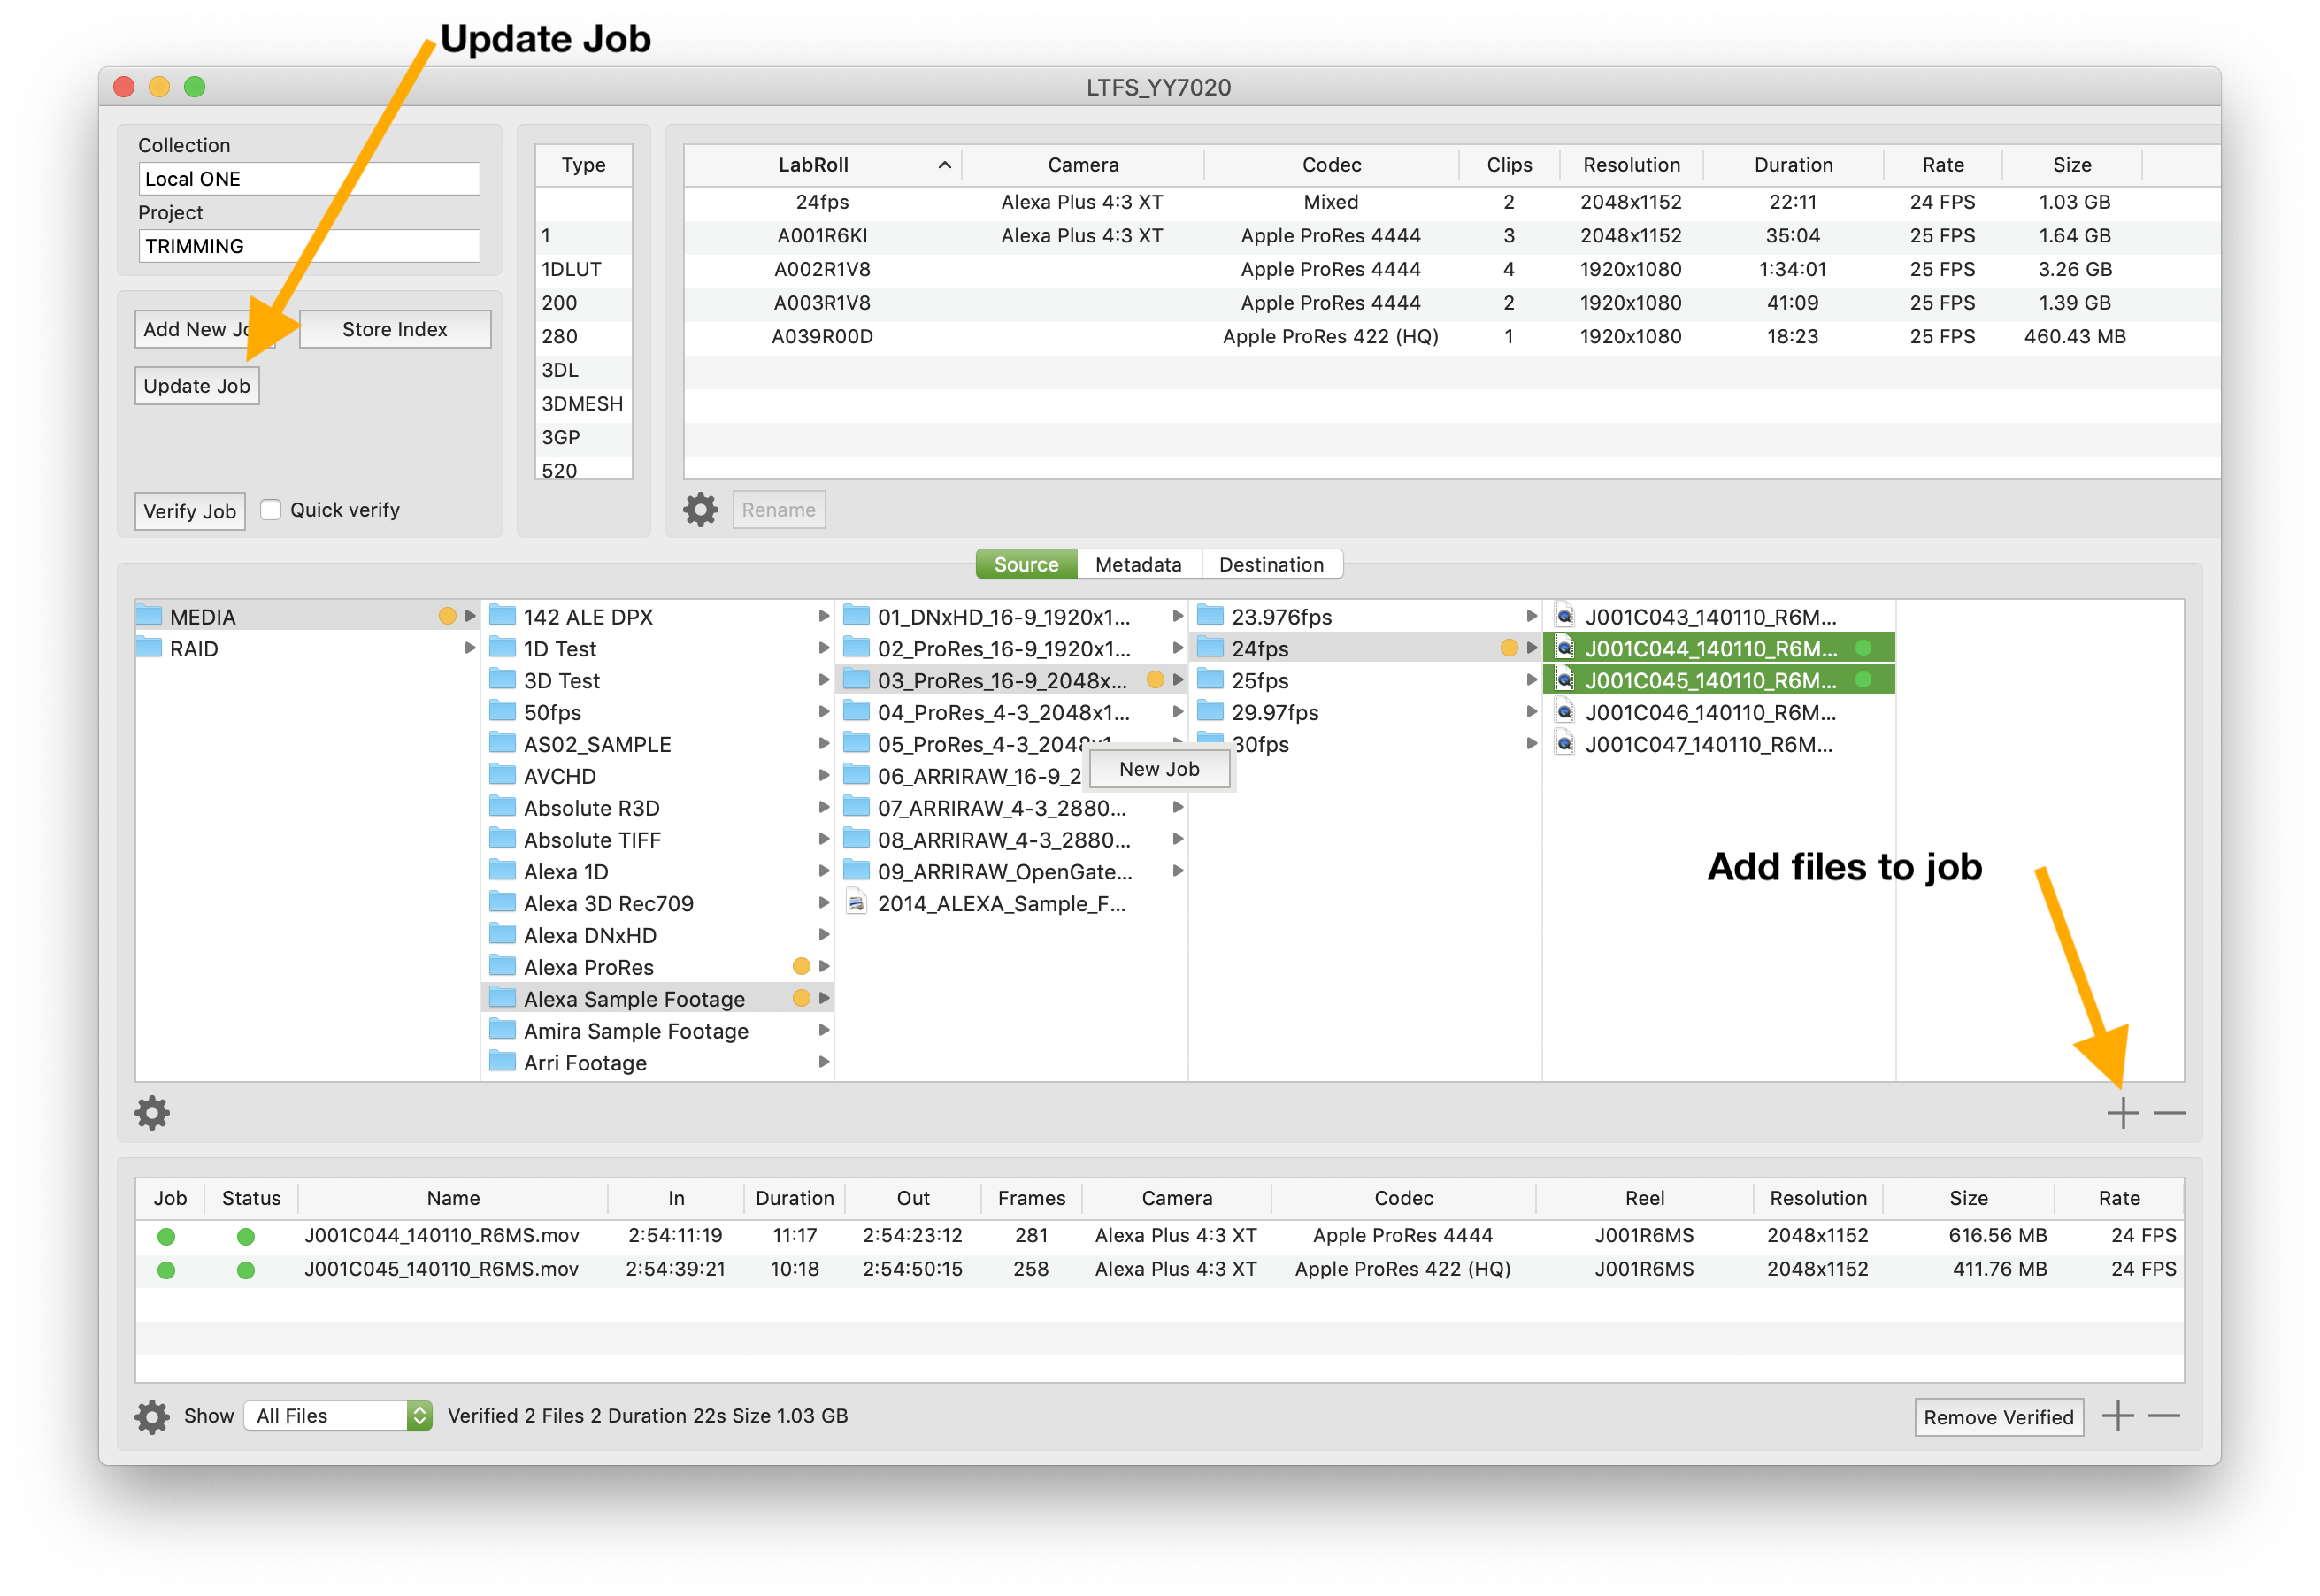
Choose some files
Select some files and click the + button to add them to the job
Update Job
Click the Update Job button on the left of the Source Browser. Now instead of restoring all the files from the tape, the job is now 14 files. Now click the Start button.

Restore complete
When complete there will be a green tick next to the source, the number of files copied and verified will be displayed, reports will be generated and the Project database will be updated.