Queuing jobs

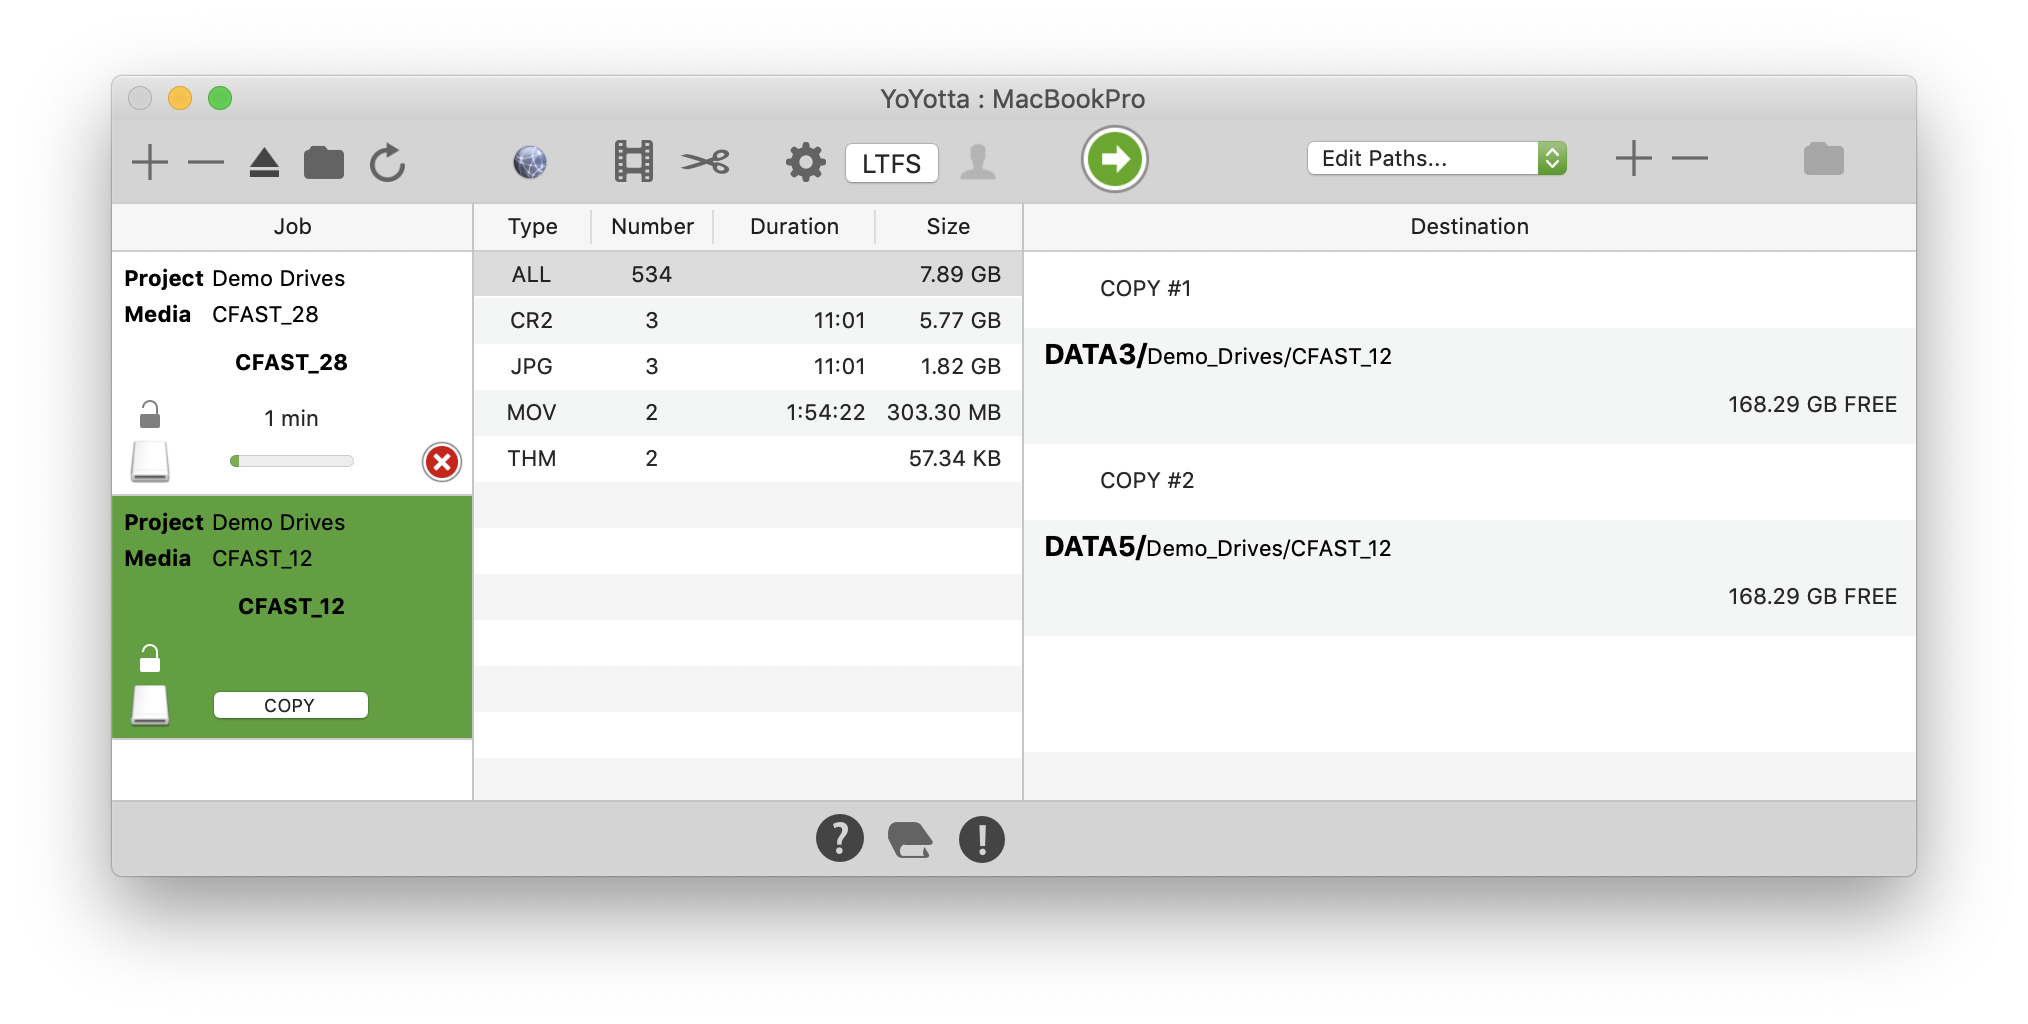
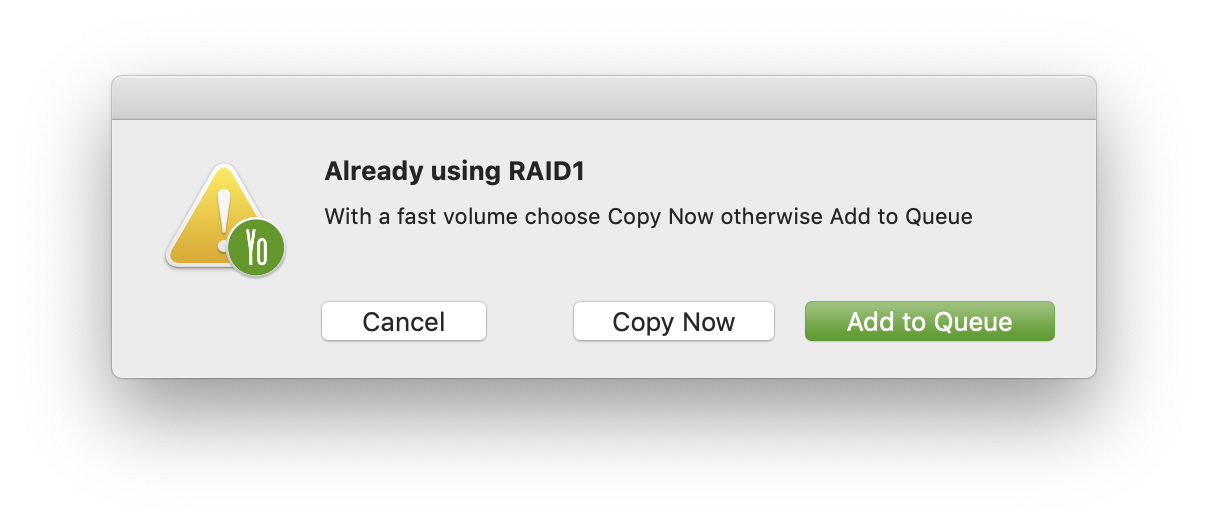
When jobs share slow shuttle drives it is quickest to run them sequentially using a queue.
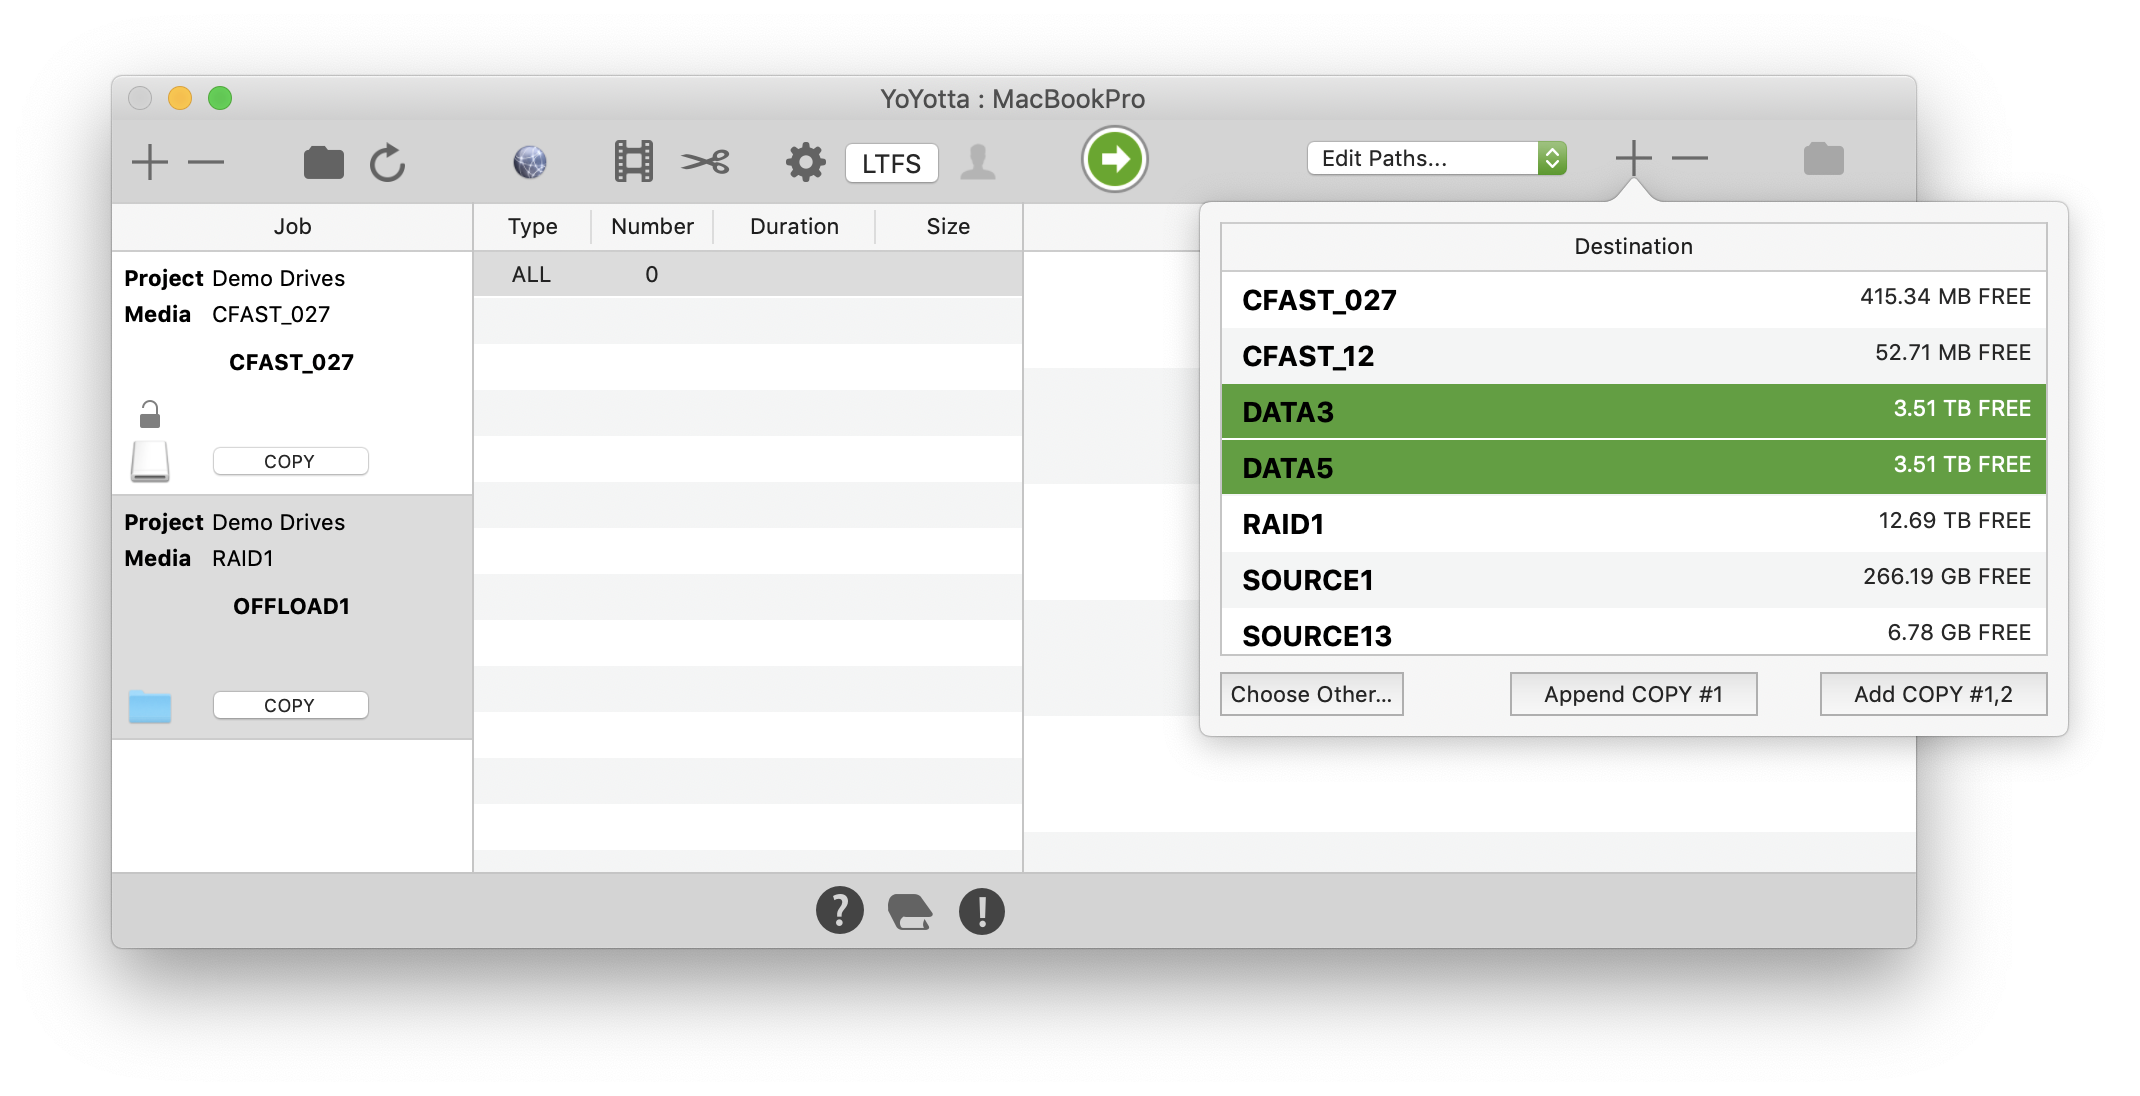
Other jobs where multiple copies are needed on slow devices may benefit from using a queue.
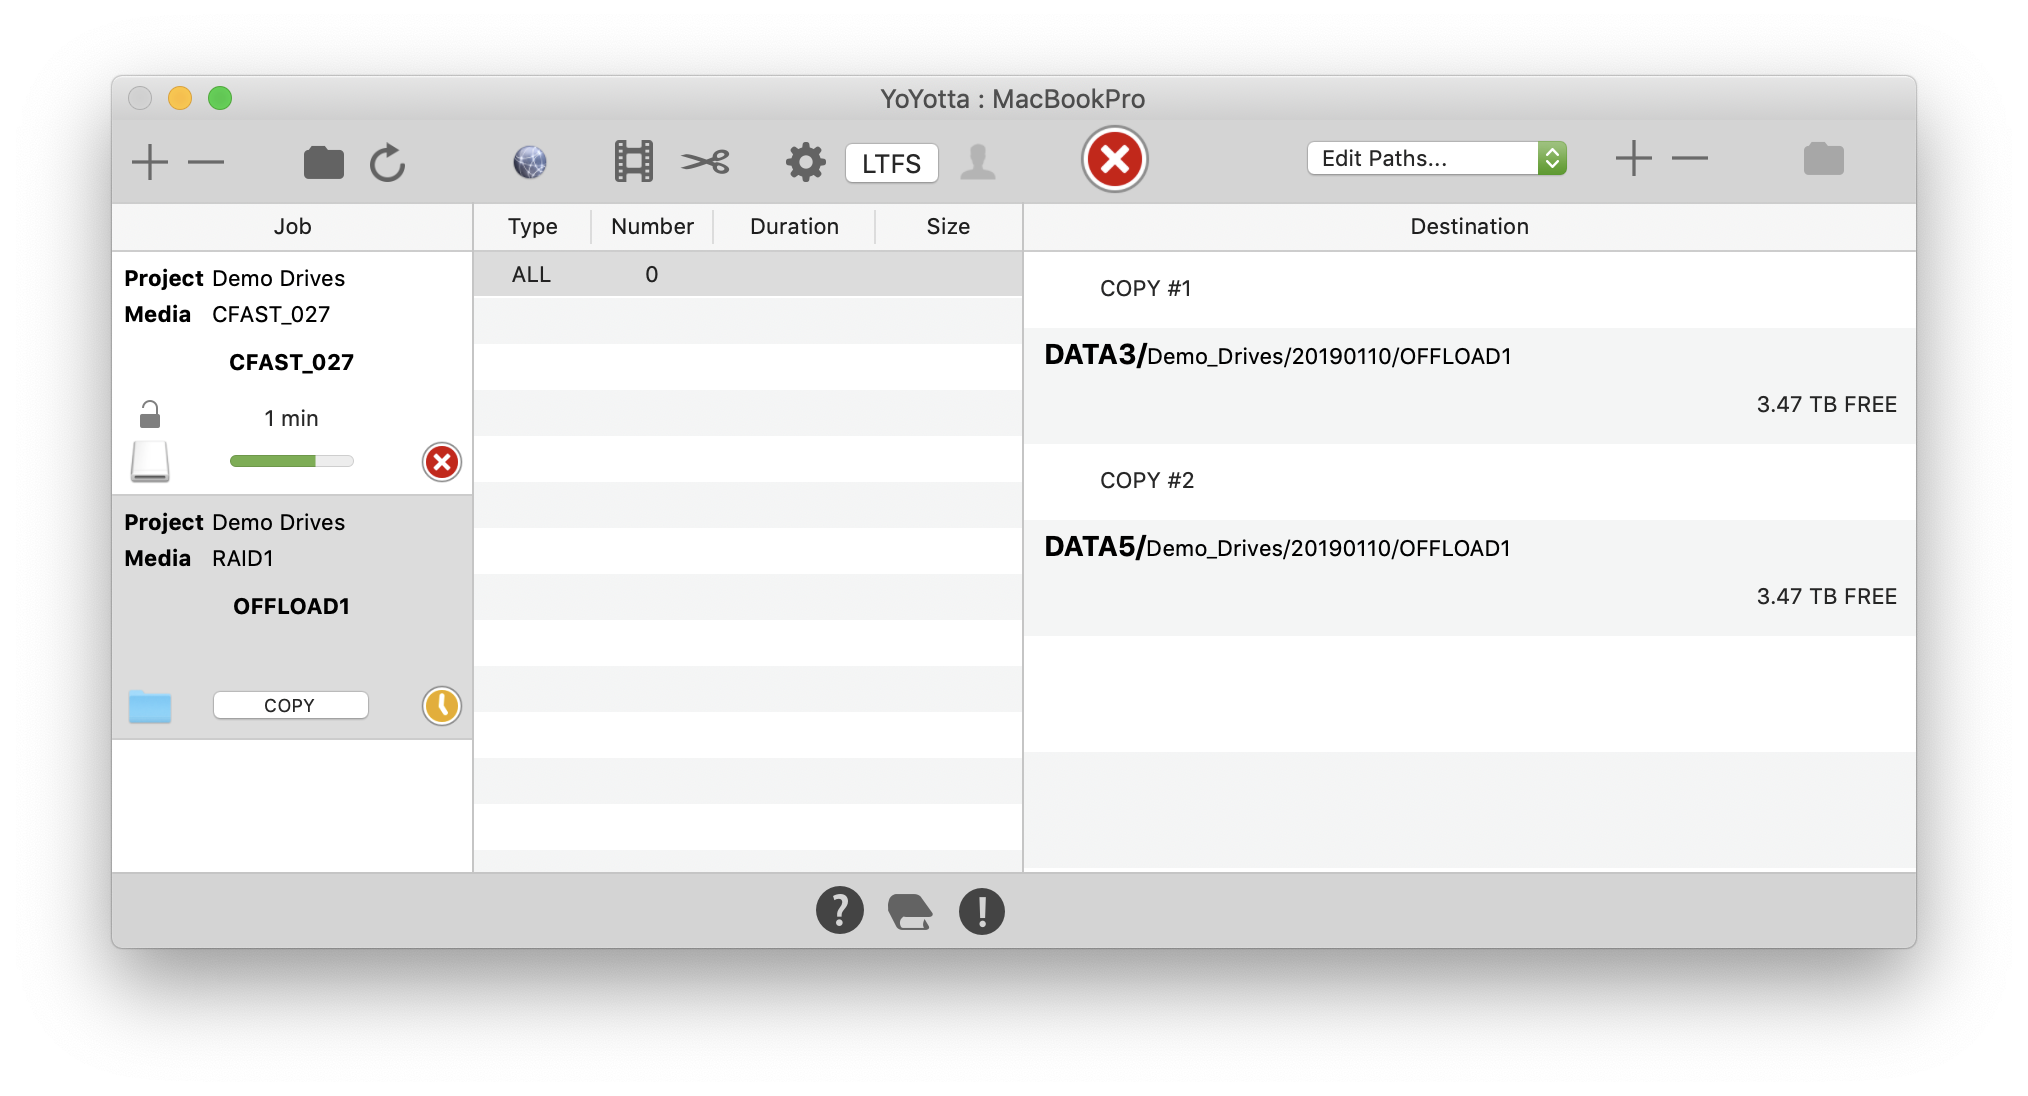
Any job using a tape or hard drive that is already in use will be queued until the first job completes.
Otherwise jobs start in order.

Queue a job

Here a job is already running, copying from a CFAST2 card to shuttle drives DATA3 and DATA5.
We have two card readers and we need to copy from a second card to the same shuttle drives.
When the second job is started as both jobs are using the same destination drives then YoYotta will show a dialog.


Add to Queue

DATA3 and DATA5 are regular hard disks, so it will be quickest to add the second job to a queue. Then it will wait until the first job completes.
Click the Add to Queue button.

This is better because writing two or more jobs to the same hard drive at the same time will be slower and the files will be fragmented on disk.

If there was a fast RAID as the destination, then the jobs could run in parallel and we would click the Copy now button. With two or more card readers using a fast local RAID makes sense.

If another job is run using the same destination then the dialog will not appear. Instead the preference to copy now or add to queue will be used again. If you need to see the dialog again you will need to re-run YoYotta.


Queued job

The second job is now in a queue and will start when DATA3 and DATA5 are no longer being used. See the yellow clock icon marking this job.
If required you can stop the queued job by clicking the large red stop button.
If there are multiple queued jobs, they will be processed in order from top to bottom of the job table. Use drag and drop to rearrange the job order.

Multiple copies

Copying to a RAID makes sense as it will be quicker, but one copy will not be safe enough. For this job we will make two extra copies using shuttle drives. The extra copies could also be on LTFS tapes.
The job could be run like this to three destinations in parallel. The RAID write speed is over 1GB/s, but DATA3 and DATA5 are hard drives that run around 100MB/s.
The CFAST2 card reader is fast and can be read at 500MB/s, so the job speed will be limited by the shuttle drives. This means that it will take longer before the card reader can be used for the next camera card.

Cascading copies

Setup copy to RAID

A camera card has been added as a source, YoYotta has indexed the folder and shows that there are 64 MOV files to be copied. Open the Finder and create a folder on the RAID, then drag that in as a destination. Here the offload folder is called OFFLOAD1.


Setup copy from RAID

Drag the same OFFLOAD1 folder from the RAID in the source for a second job.


Add the final destinations

Now drop in the destination. Here we are making two identical copies to shuttle drives called DATA3 and DATA5.


Start both jobs

Select the first job that will copy the camera card to the RAID and click the start button.
Now select the second job that will copy from the RAID to the shuttle drives and click the start button. Because the RAID is in use a dialog will appear. Click Add to Queue


Copy queues and starts automatically

The second job is now in a queue and there is a yellow clock shown in the job table. When the first job is complete YoYotta will index the OFFLOAD1 folder, locate the new files and start the new job. Select the first job again and click the eject button to remove the camera card. Now the first job can be removed and the process can be repeated with a new camera card.

© 2024 YoYotta Back to Top