Troubleshooting errors during LTO archive and restore
Problem writing file 'Socket is not connected' (57)
Problem reading/writing file 'Input/output error'
Problem creating folder 'Read-only file system' (30)
If errors like this appear in the YoYotta log and the path in the error includes LTFS or there is a number 5 or 6 on the LED display on the front of the tape drive then check here for more information.
LTO troubleshooting
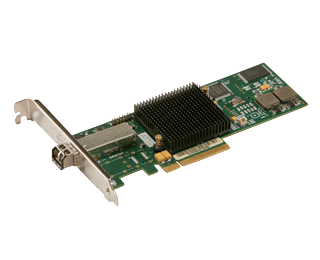
ATTO Fibre Channel (FC) interfaces
All FC LTO drives have 8Gb/s interfaces.Unlike SAS each FC connector only supports the direct connection of one LTO drive.
If the drive has a Fibre Channel connection there are ATTO Celerity FC 8Gb, 16Gb or faster PCIe cards.
As the tape drive interface is 8Gb there is no advantage to the faster interfaces when using a direct connection.
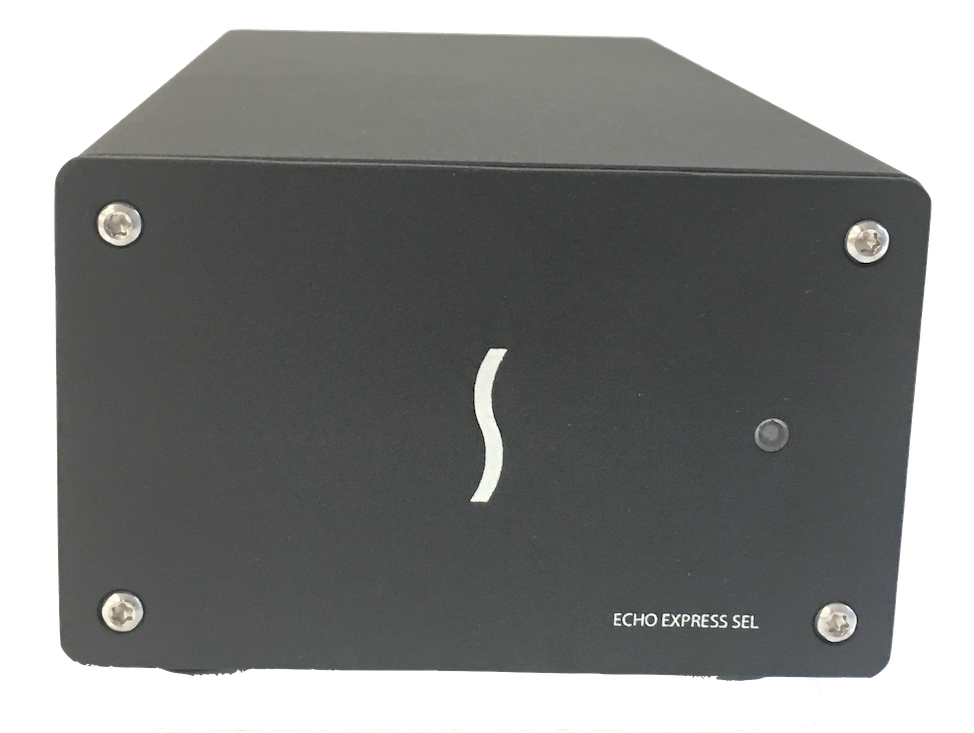
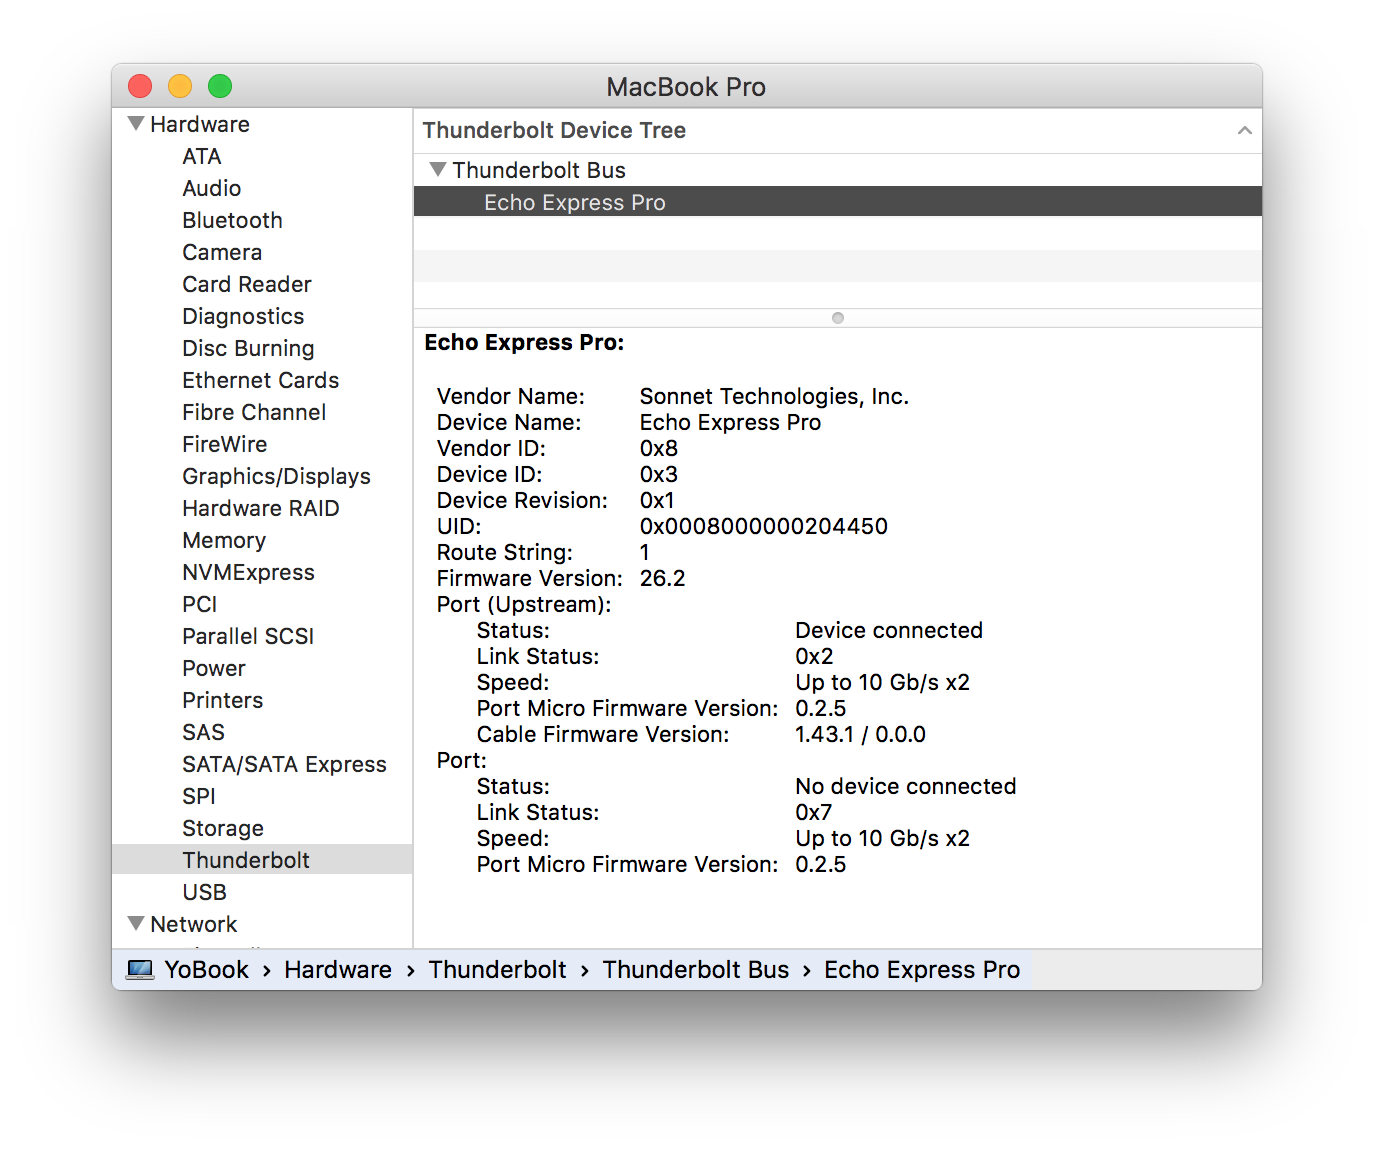
Use one or more ATTO FC cards in a Thunderbolt expansion unit like the Sonnet Echo Express SEL shown here.
There are also TLFC-2082/2162 Thunderbolt2 to FC interfaces, they have 2 FC connectors so they can only control 2 drives.
TLFC-3162 and TLFC-3322 Thunderbolt 3 FC adaptors have issues with direct connections to LTO drives so they are not compatible.
A possible workaround is to use a Fibre Channel switch between the adaptor and the LTO drive. This is another reason to use SAS LTO drives wherever possible or use a Celerity 8Gb or 16Gb card in a Thunderbolt enclosure.
Ensure the Mac has the latest driver installed and that the interface has the latest firmware.
- Download the ATTO360 Storage app, macOS driver and macOS Flash Bundle
- Install ATTO360 Storage and the macOS driver
- Run ATTO360 Storage and update the card flash firmware
- Use the standard ATTO FC driver NOT the ATTO multipath driver
- Enable Native Multipathing
- Maximum I/O Transfer Size to 1 MB or 1048576 bytes
Checking hardware devices
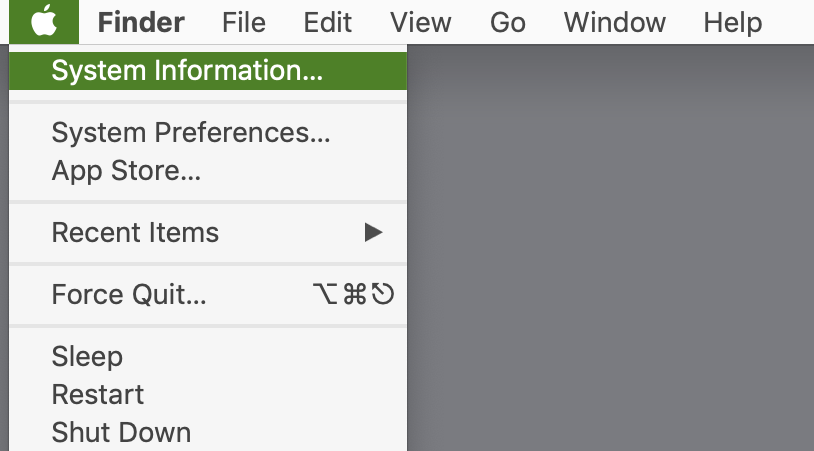
To check that the Mac can see the ATTO and LTO hardware hold the alt key on the Mac keyboard, click the Apple Menu and select System Information...
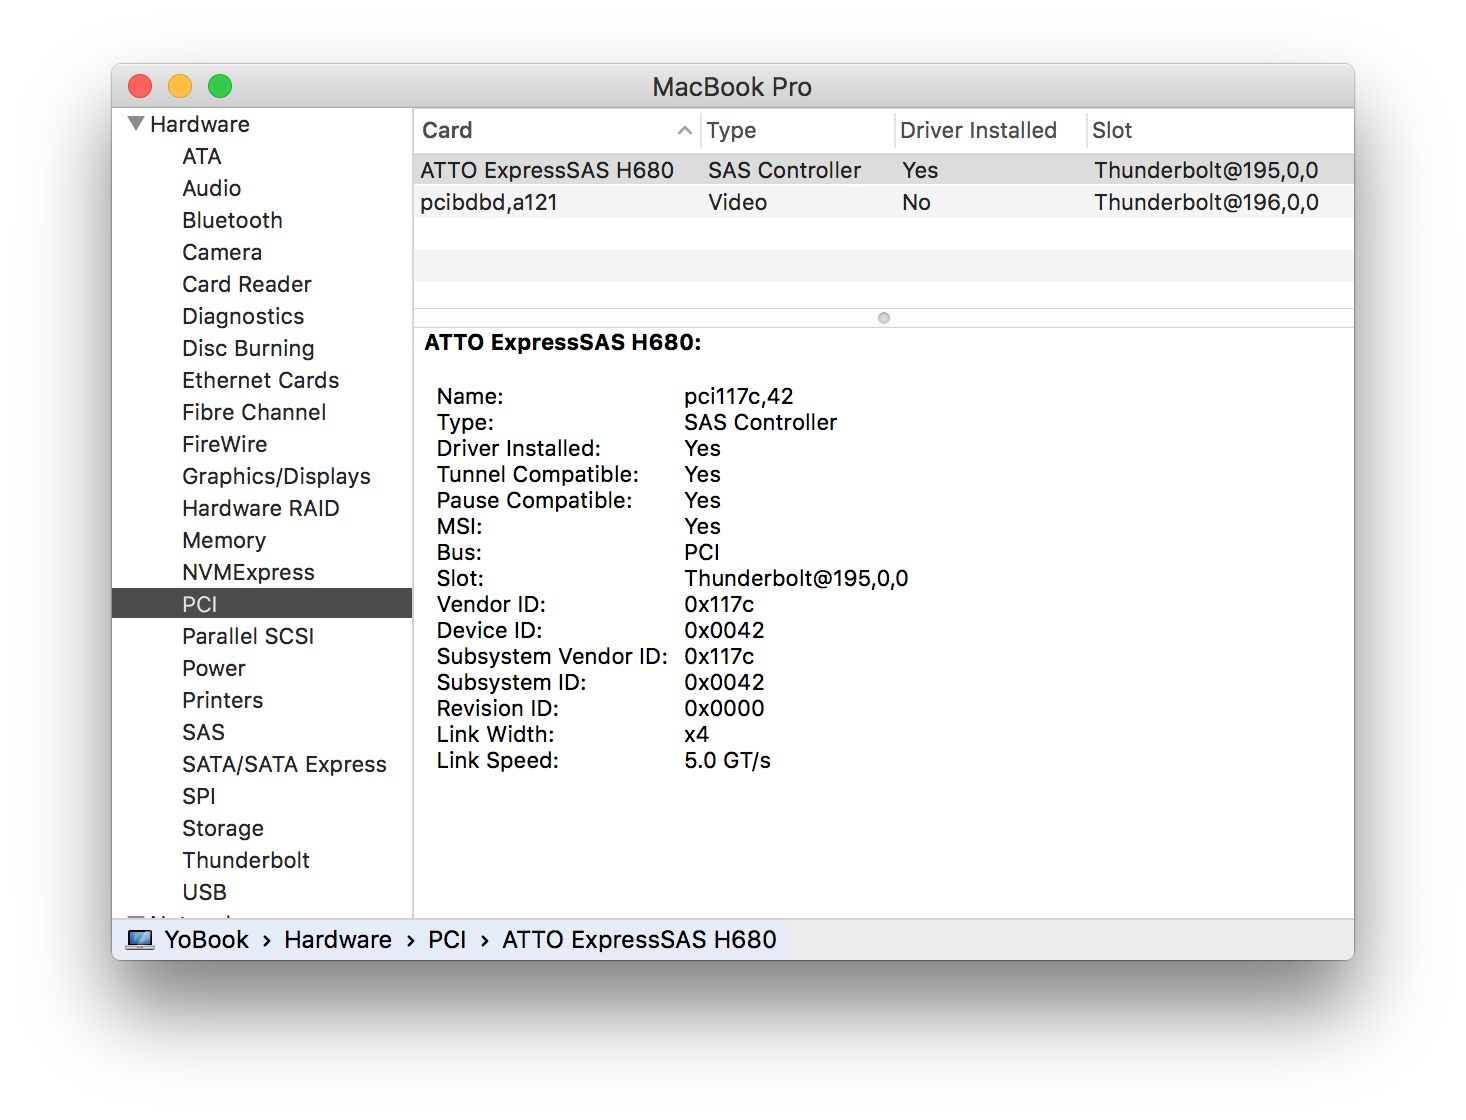
Check for PCI devices
If using an ATTO card inside a Thunderbolt enclosure, then select PCI from the left hand Hardware list. The ATTO Fibre Channel card should be shown.
Check for Thunderbolt devices
If using an ATTO card in an Thunderbolt enclosure, or you have a Thunderbolt LTO drive, then click Thunderbolt. Here the Sonnet Echo Express Pro is connected to the Mac. If there is no Thunderbolt device, then try reconnecting or using a different Thunderbolt cable. Also power cycle the Mac, interface and drive.
ATTO Driver missing or blocked
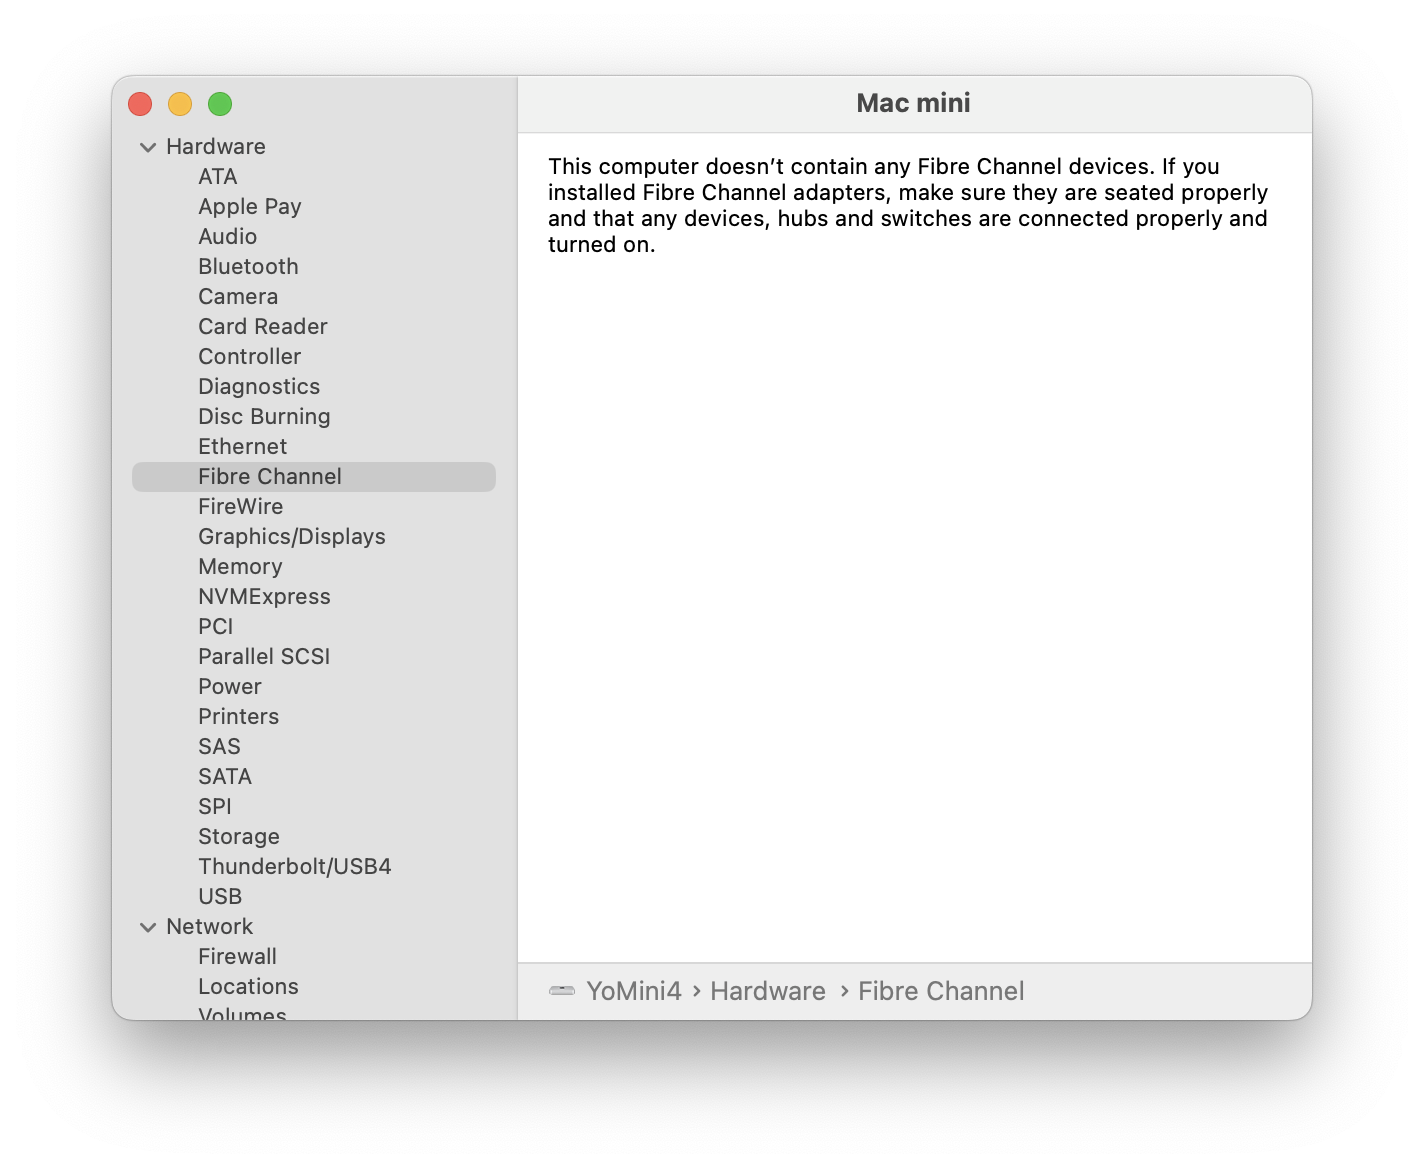
Now select Fibre Channel from the Hardware list. Here the driver has not been installed so no devices are shown. On newer macOS versions the driver may also be blocked, see the next section.
If missing then download and install the Mac driver for the Fibre Channel interface from the ATTO website. Then reboot the Mac.
Note that Thunderbolt drives have a SAS tape drive and a SAS interface inside, so they also need a driver from ATTO or Areca.
Allow system software in System Security
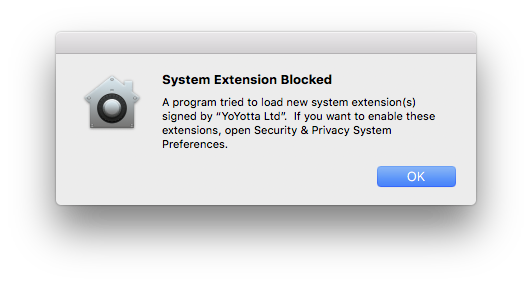
The first time after you install ATTO drivers on a new system, you will need to approve the new System Software. Also new installs of system software from YoYotta, ATTO, OSXFUSE (developer is Benjamin Fleischer) and other drivers may need approval.
You will see a message like this saying System Extension Blocked
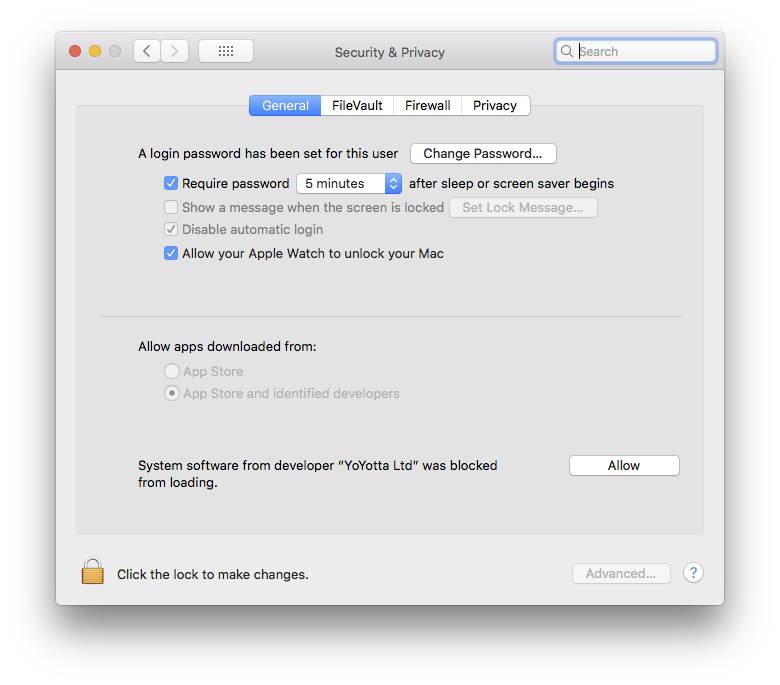
Open the Security & Privacy page in Apple System Preferences, unlock the padlock and click Allow to enable the System software to load.
You must click the Allow button locally on the Mac, clicking using remote screen sharing will not work.
If the Allow button is not shown then reboot your Mac, try again to use an LTFS tape (which will fail) and then check the Security & Privacy page again.
Also ensure that you have the latest updates to your version of macOS

Files and Folders access
When running YoYotta you may see macOS requests to allow access to Removable Volumes or Network Volumes. Note that LTO tapes mount as Network volumes. Please allow these requests.
If there are problems mounting tapes or drives then you can check and enable access in Files and Folders in the Security tab as shown in the screenshot.
YoYotta does not need Full Disk Access.
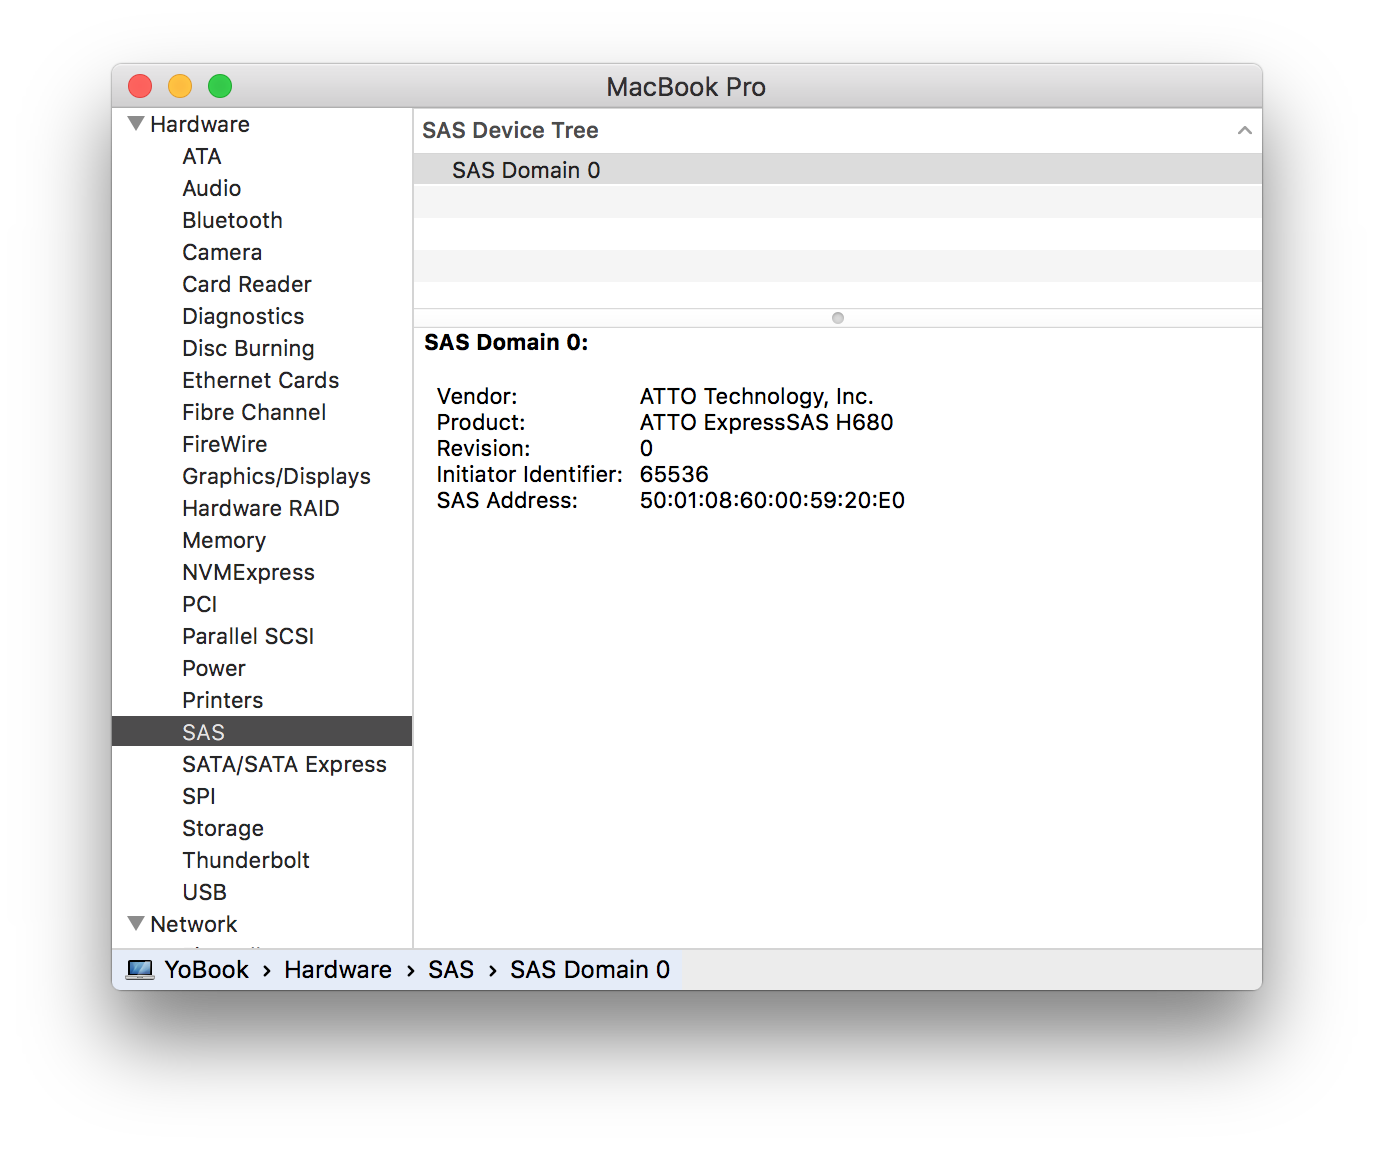
ATTO Driver installed
Now the driver is installed and the ATTO Fibre Channel device is shown. No tape drives are connected.
These screenshots show SAS , however you will select Fibre Channel
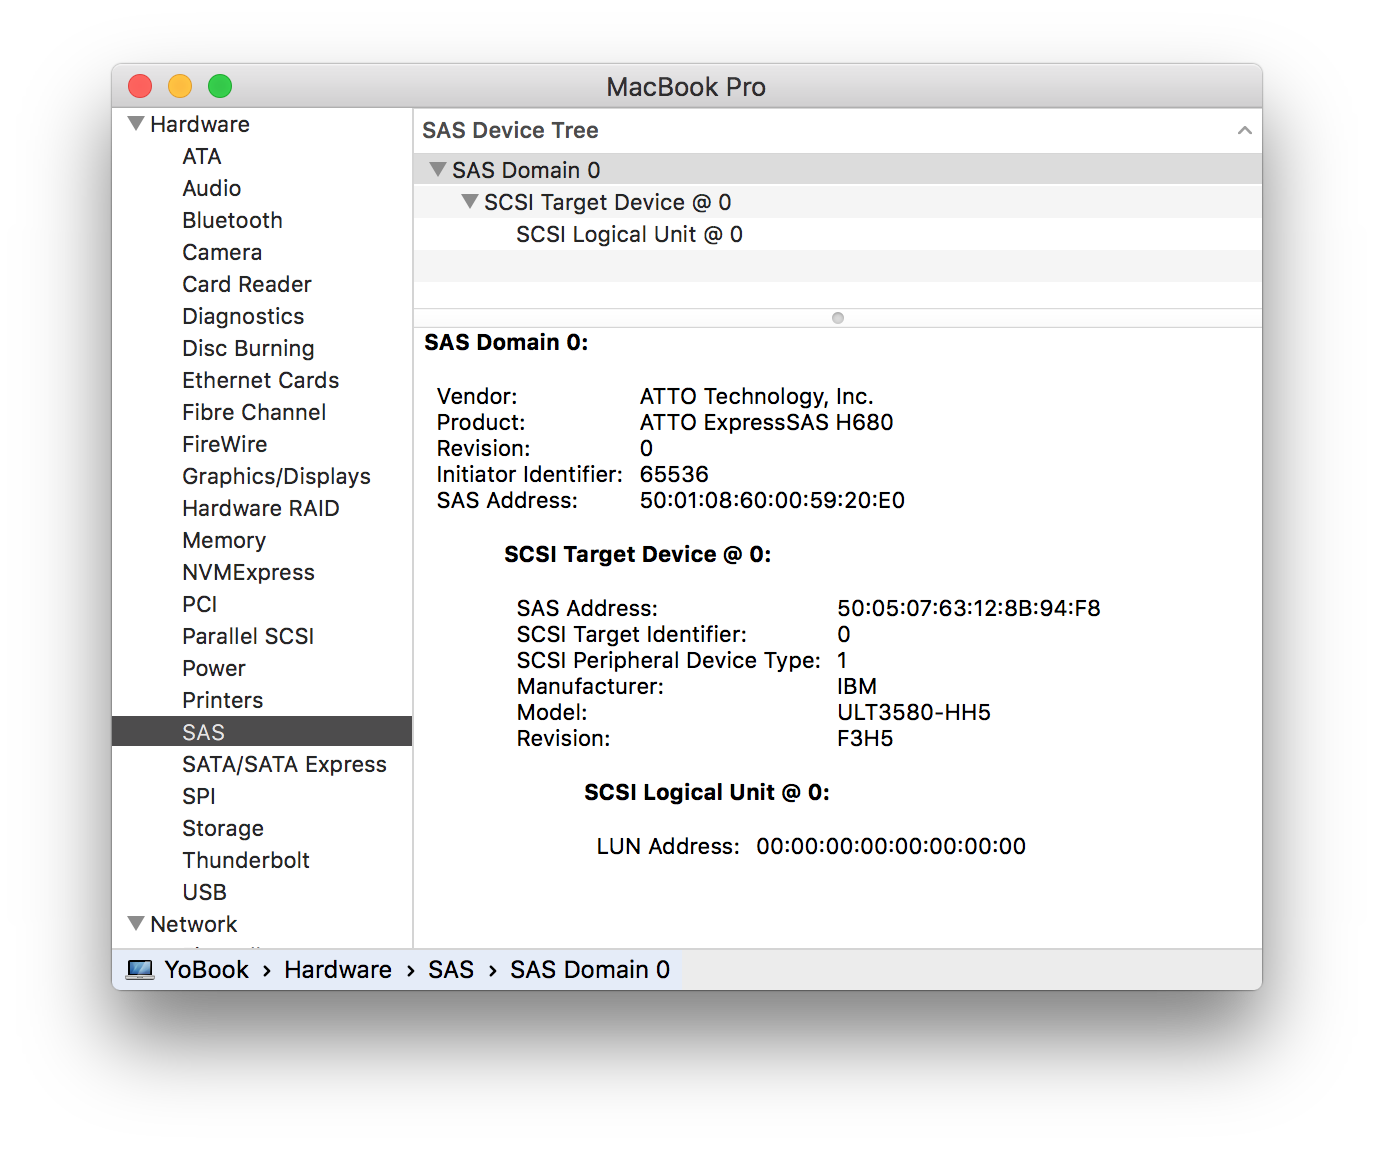
LTO drive connected
Make sure an LTO drive is connected and powered on, now a SCSI Target
Device @ 0 is shown. Here an IBM LTO-5 drive is connected.
YoYotta with LTO drive support will now be able to control this drive.
The System Information page does not refresh automatically. Click File,
Refresh Information or Command + R to refresh the hardware listing.
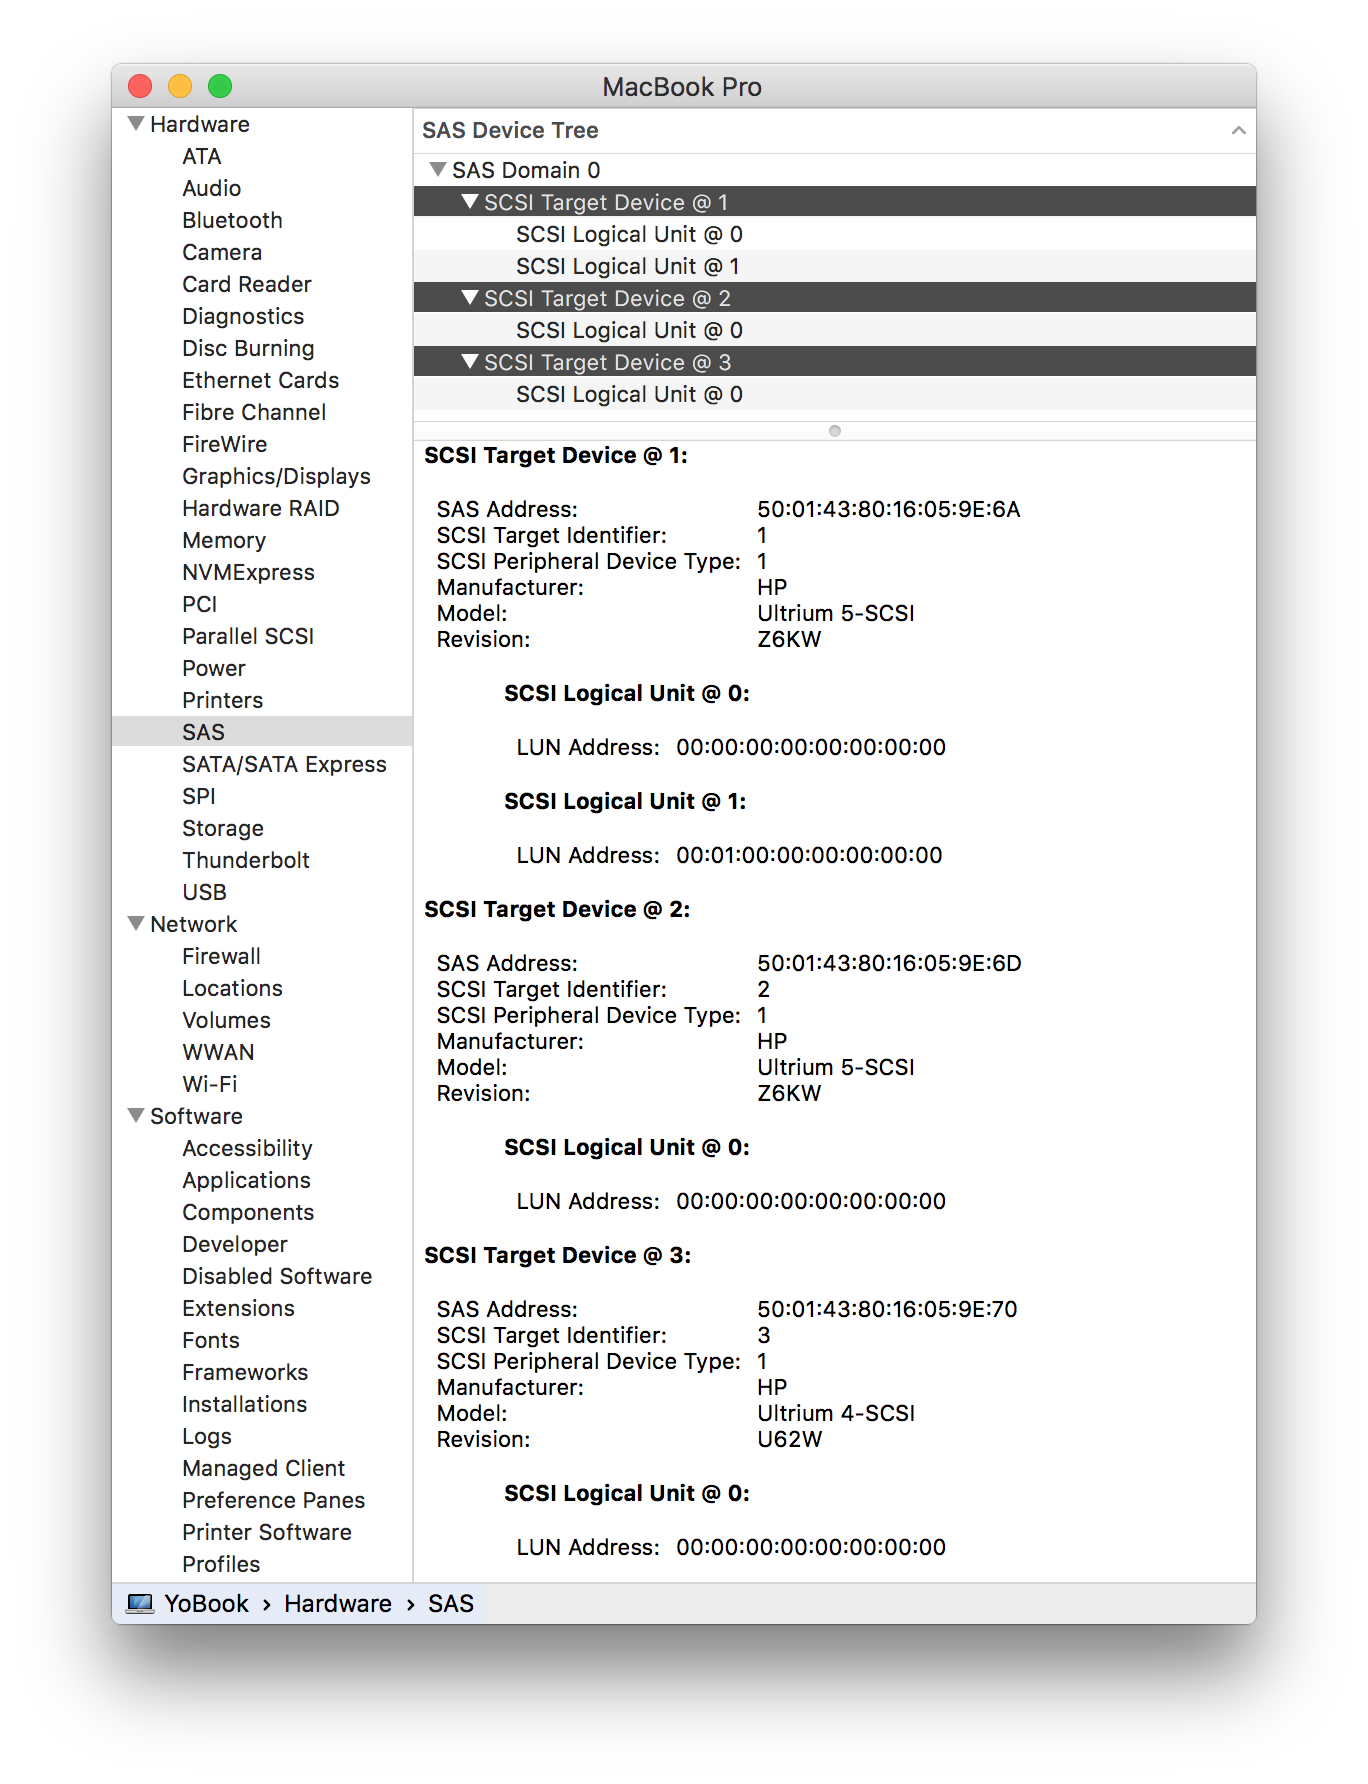
LTO library connected
Here an HPE MSL4048 with three LTO drives is connected.
SCSI Target Device 1 has two logical units. The first is an LTO-5 drive, the second is the library robot.
SCSI Target Devices 2 and 3 are LTO-5 and LTO-4 drives.
If all the SCSI Targets just have one logical unit then the configuration of the tape library needs to be set to allow external control.
Check the settings for the control path, which are normally in the partition settings, using the library web browser interface.
For a Quantum i3/i6 library check the Partition Control Path in the web interface and set the Control Interface to Drive. (This defaults to None)
Then refresh the System Information panel and check that one of the targets now shows two logical units.
The YoYotta Library option will now be able to control this library.
If the library is still not visible please save a system report from the Apple System Information and send it together with the YoYotta log + debug to YoYotta support and we will will try to assist you.